
Giddy up! If you love horses as much as we love horses, then this blog will give you some great horse DIY ideas for cold weather activities. When it’s too cold outside, we might not be able to visit or ride our favorite fuzzy friends as often as we’d like, but that doesn’t mean we can’t bring the fun inside.
Happy Horse Haven Play House
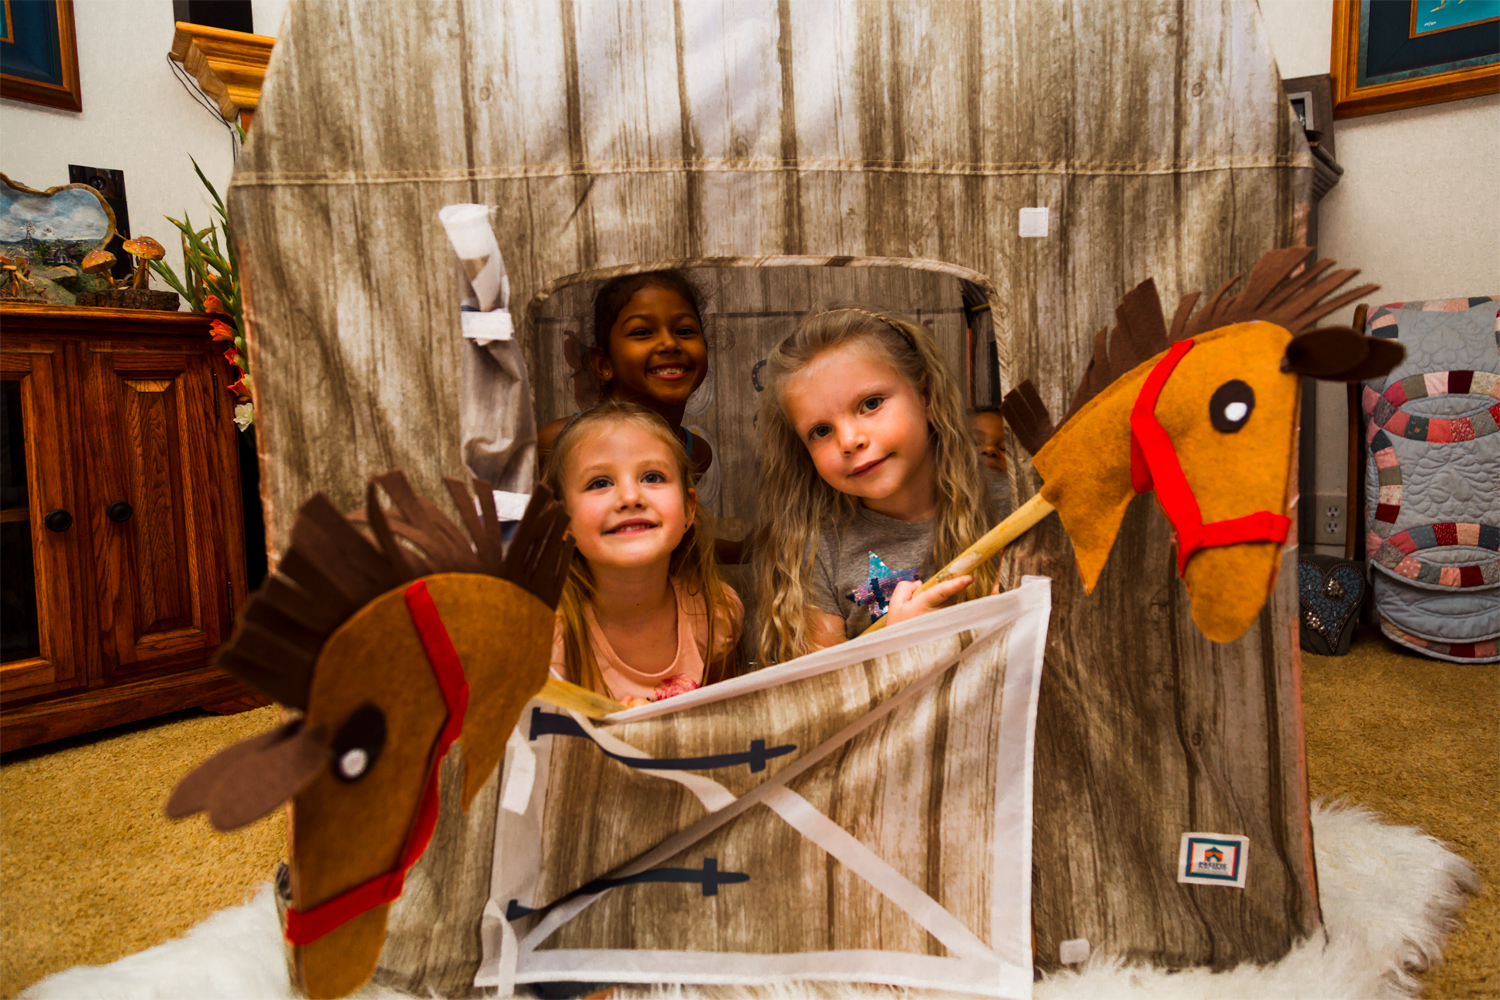
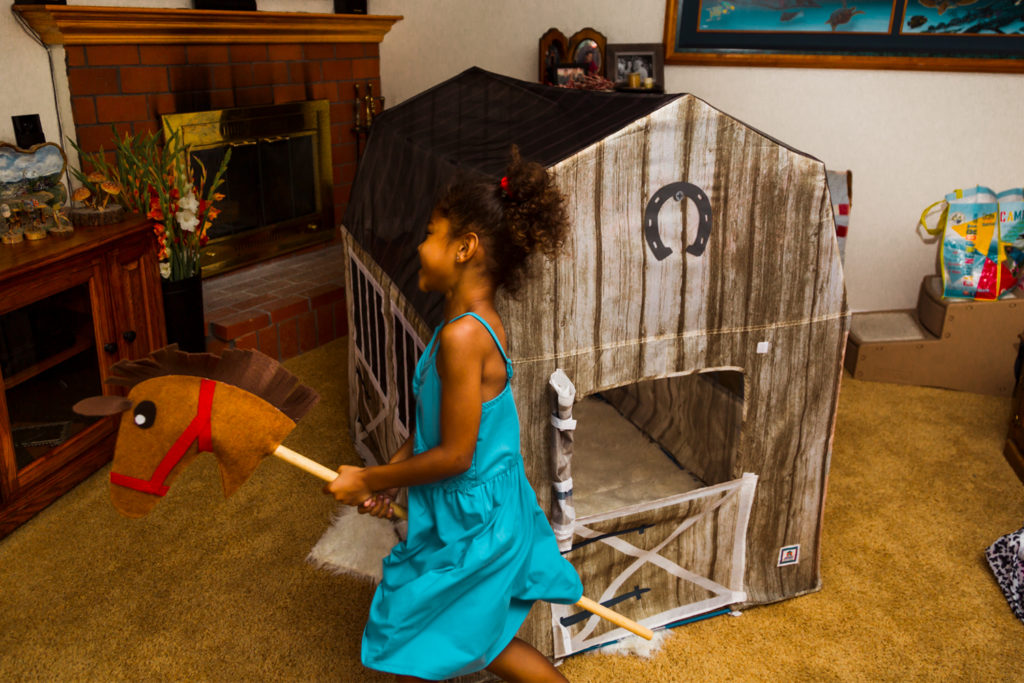
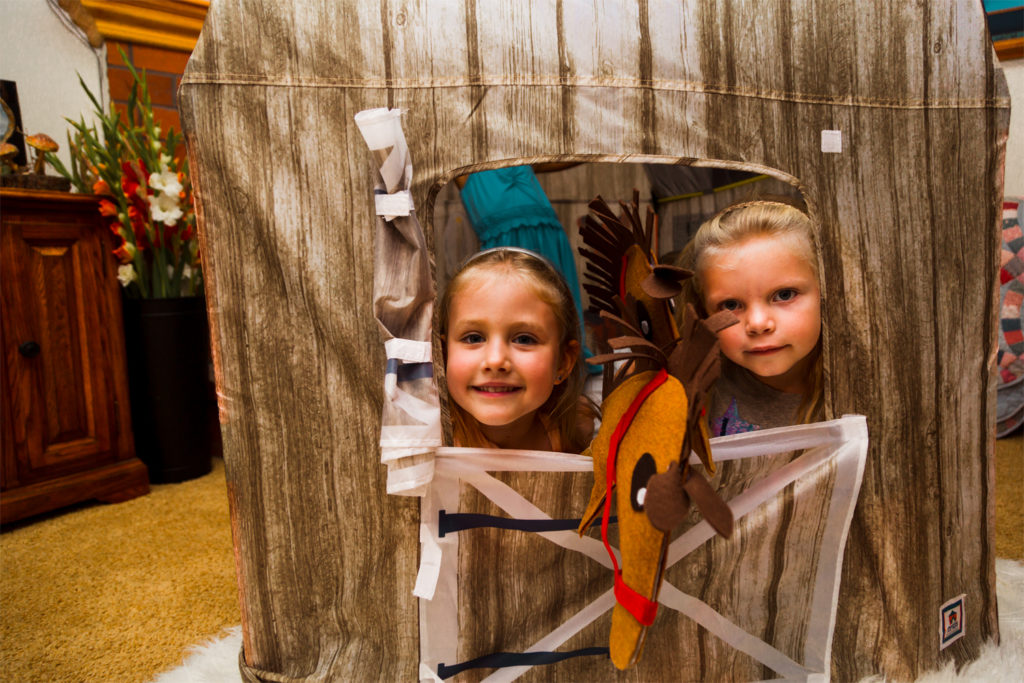
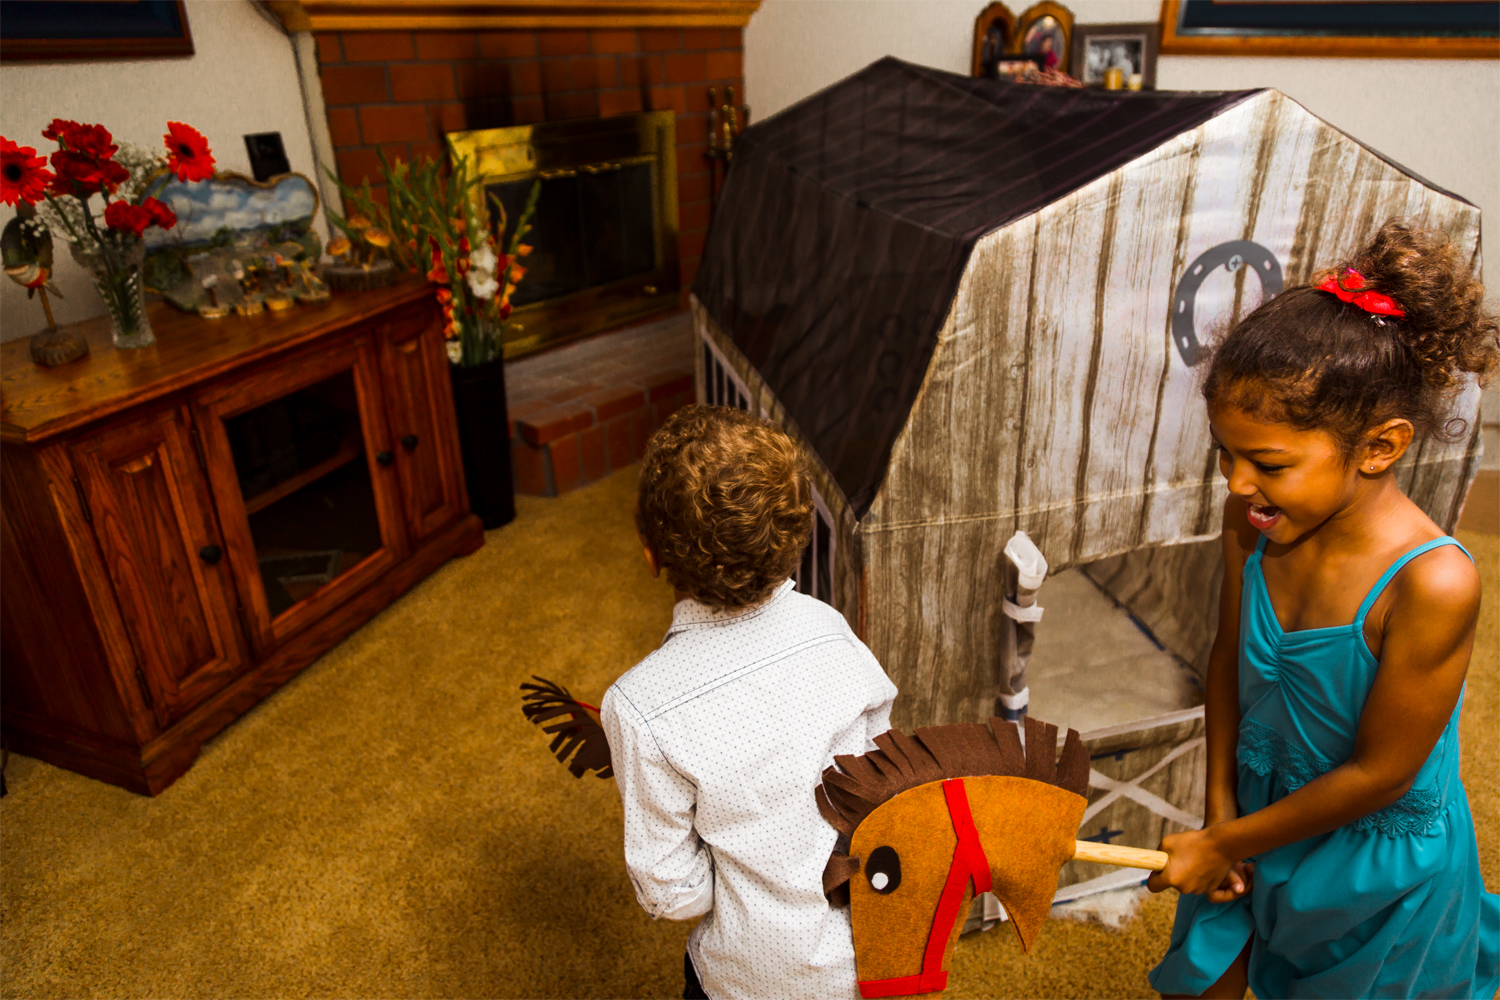
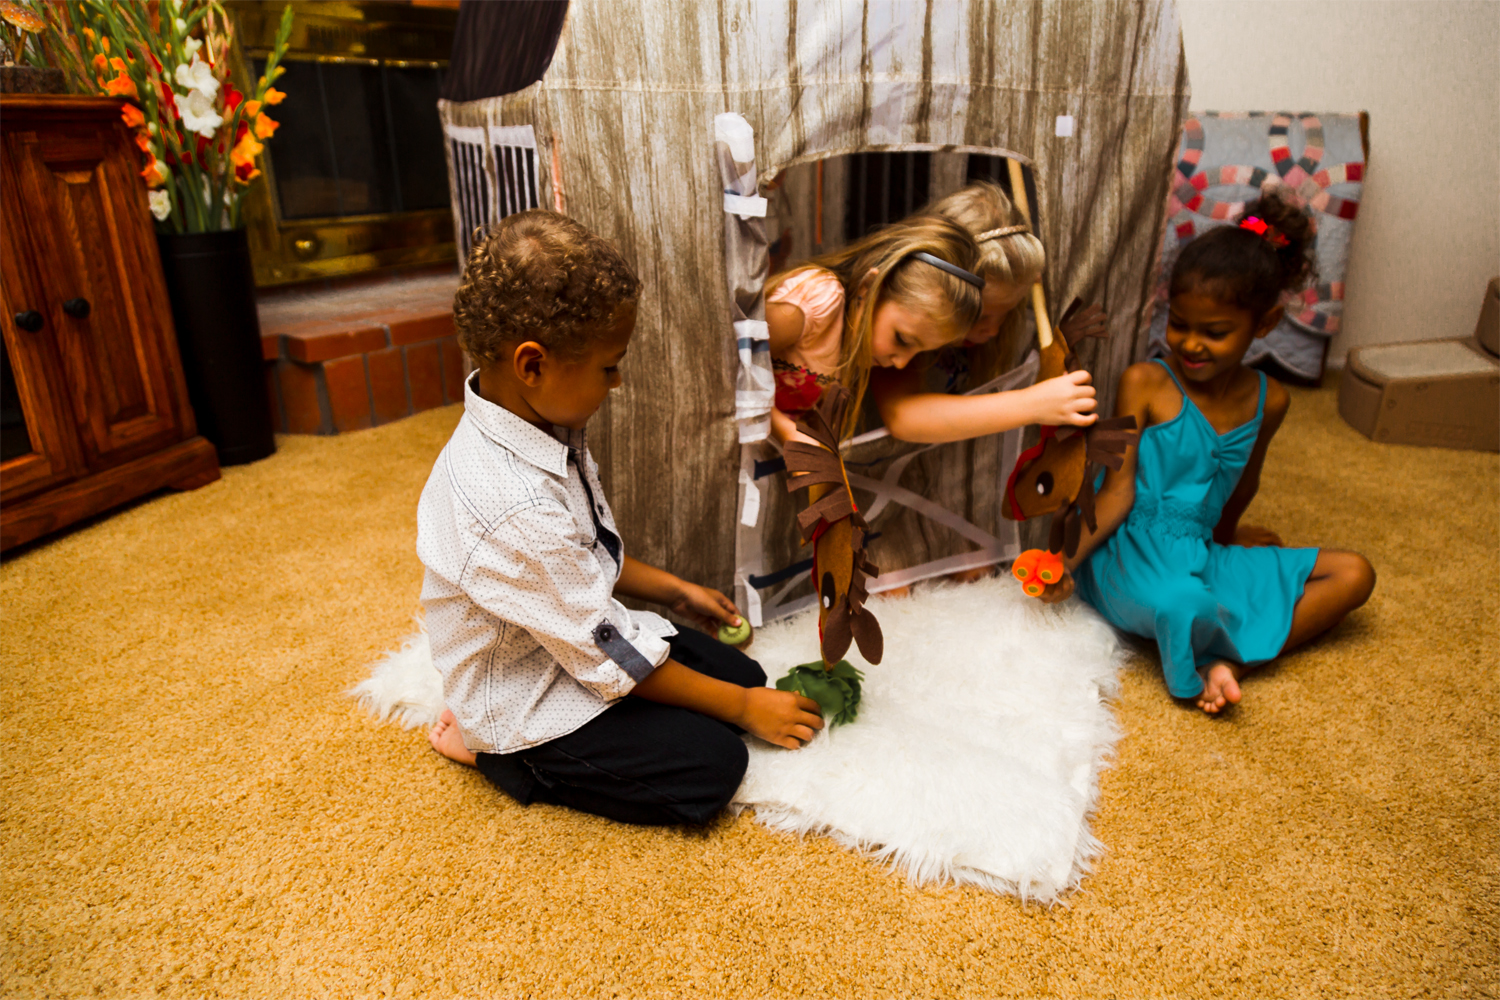
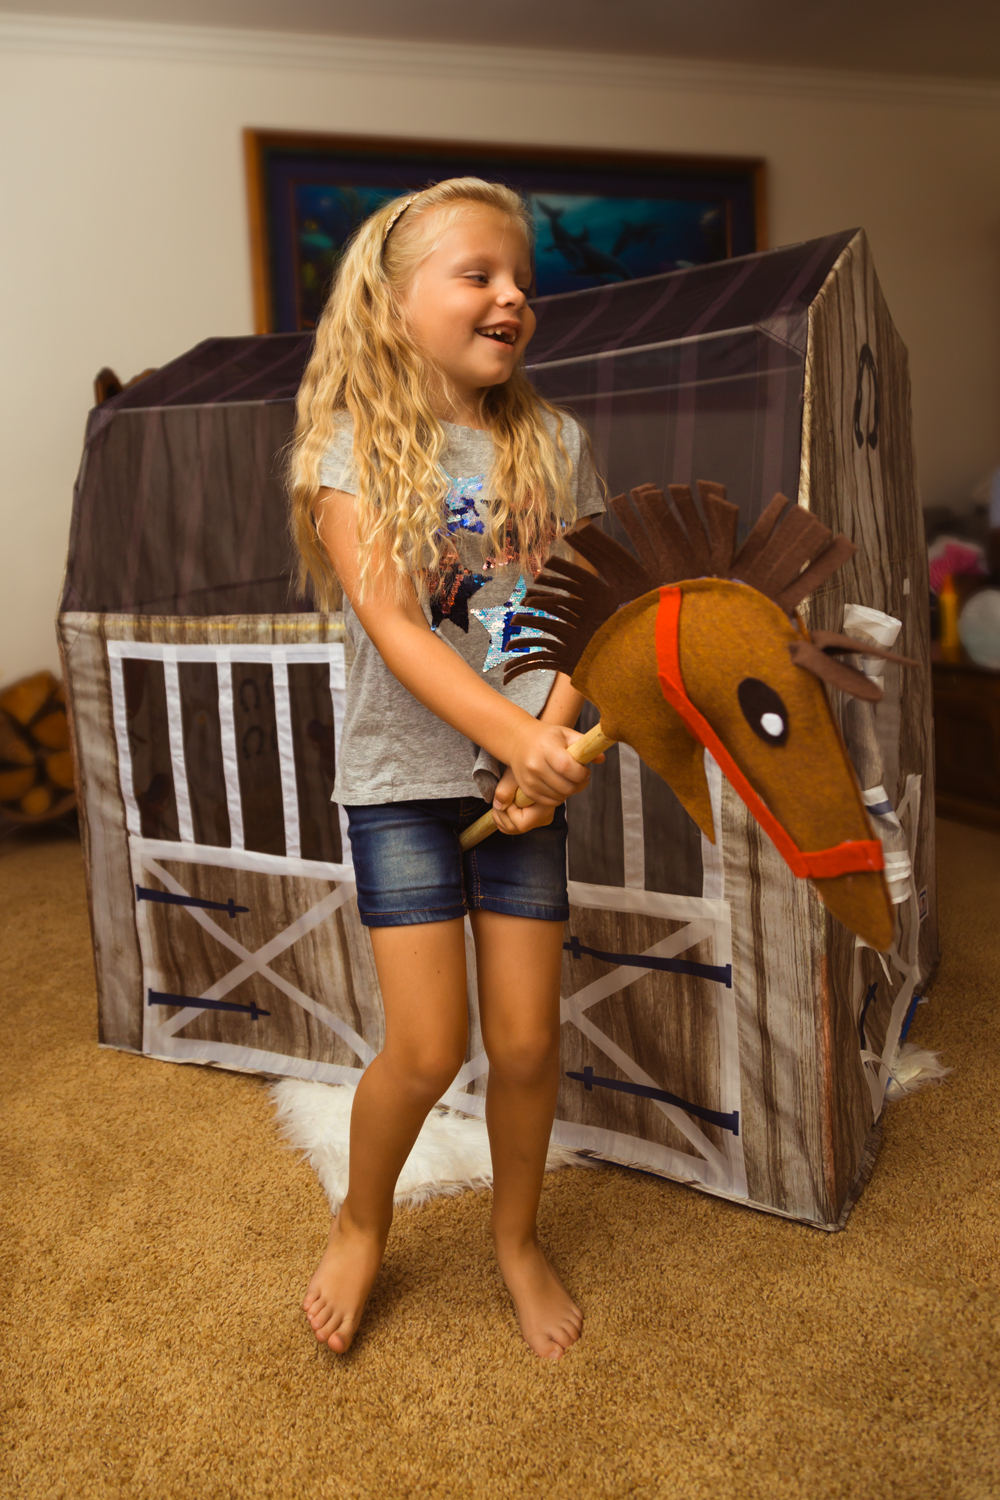
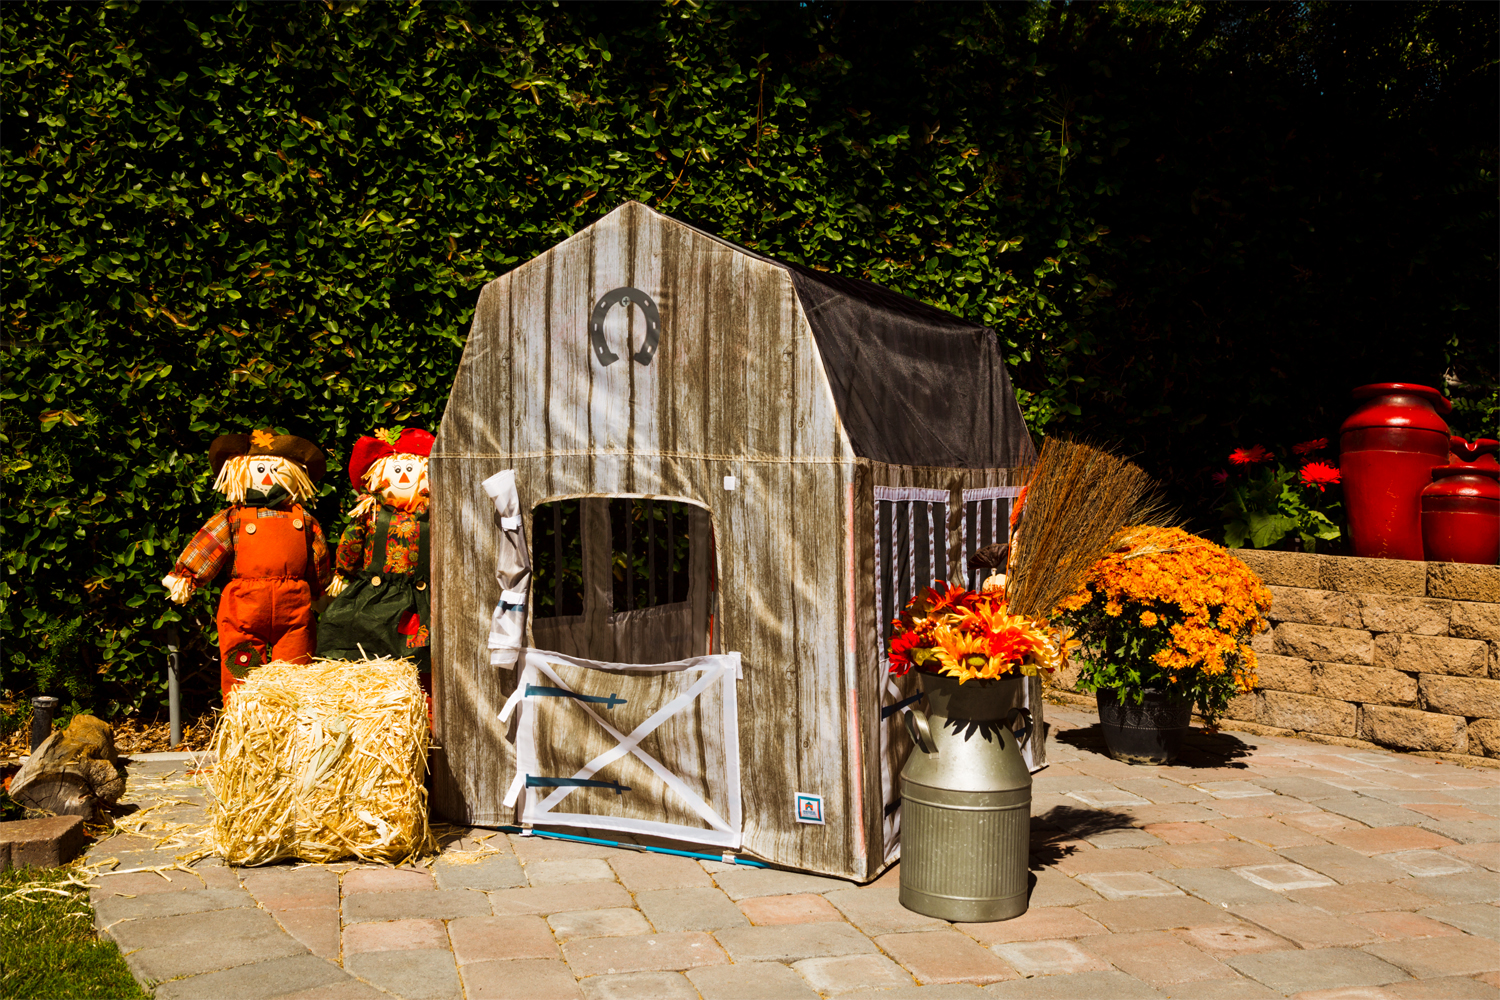
Calling all junior equestrians! If your little one dreams of quaint country living, look no further than our Happy Horse Haven Play House. Featuring an interactive stable shape and a roomy 48″ L x 38″ W x 48″ H square footage, this Happy Horse Haven Stable is sure to inspire endless hours of equine enjoyment.
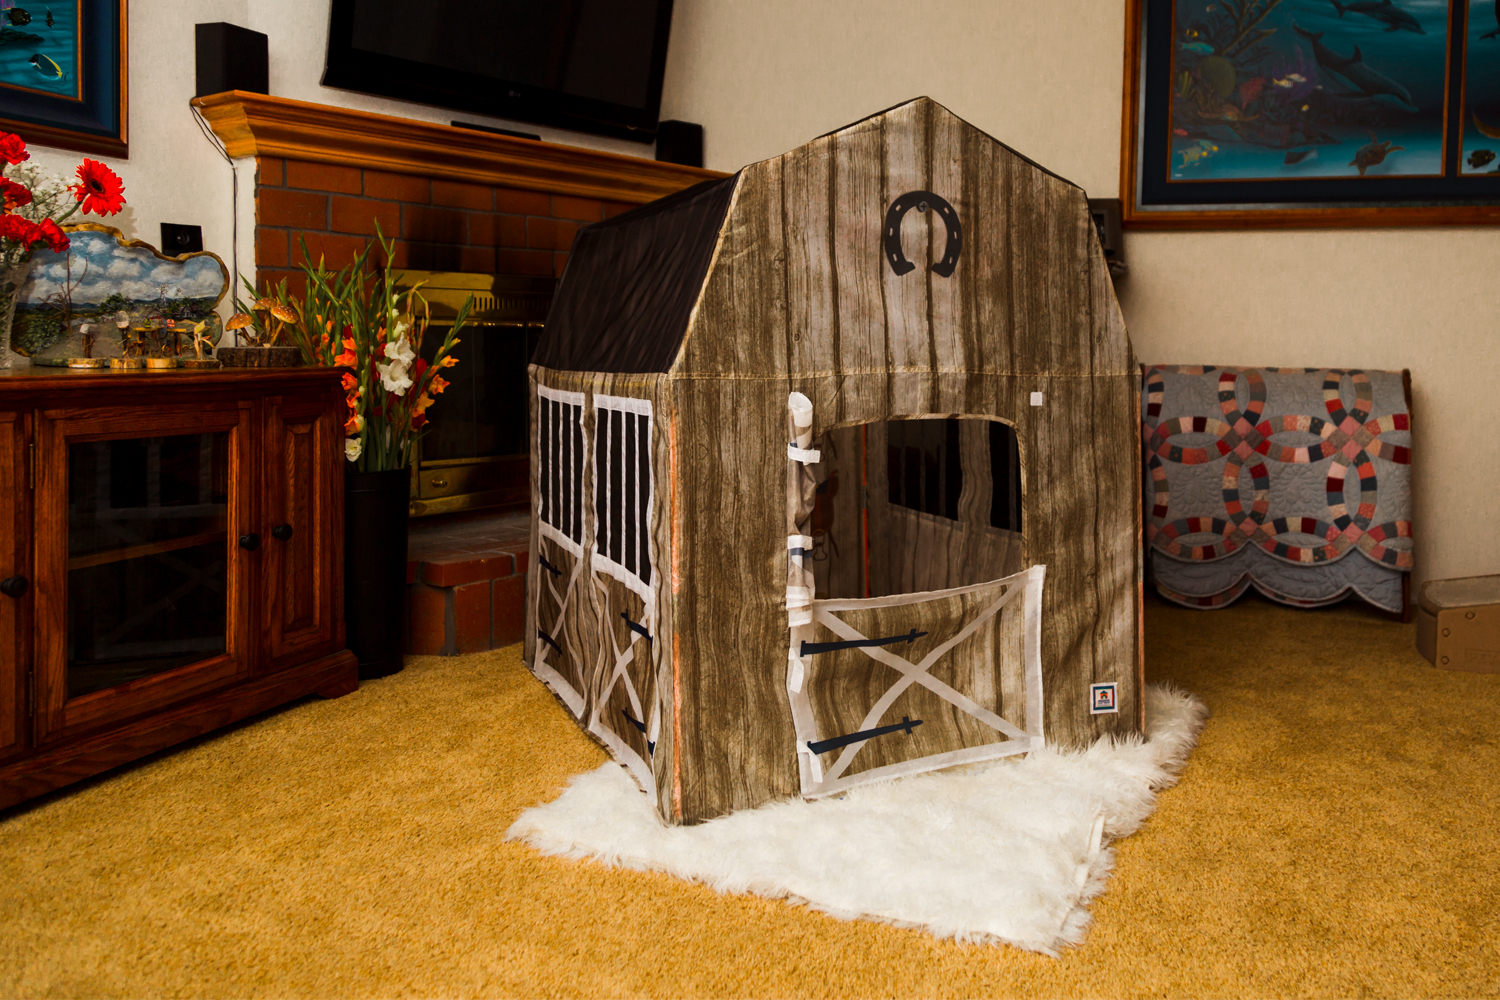
The best part of all is that the easy-to-assemble color-coded poles and simple pull-over fabric ensure that this durable stable is ready for ranching in no time! Should your child choose to “add on” to their space, they can pick from our 6 Farm Animal Chair designs. Not only is our Happy Horse Haven Stable airy and bright thanks to the “peek-through” mesh panels, but it’s also portable and versatile, making it the perfect home for horses and ranch hands alike. Saddle up!
Horse on a Stick DIY
Let’s get right down to the fun part – this super easy Horse on a Stick DIY! It might seem lengthy, but that’s because there are so many parts to the horse. We assure you, our models loved making it! Plus – it will keep them busy with something creative rather than some screen time.
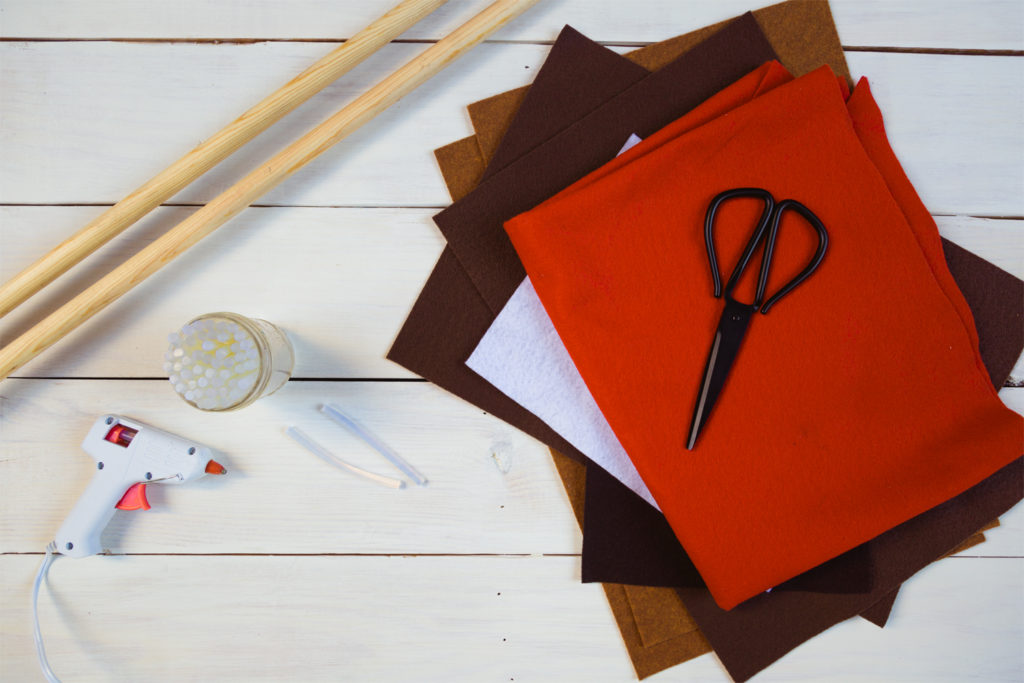
What you need
- Horse head printable (CLICK HERE)
- 11 x 17 medium and dark brown felt
- 8.5 x 11 white, black and red felt
- Scissors
- Glue gun and glue sticks
- Dowels 35″ long and 3/4 of an inch thick
- NOTE: 1 dowel makes one horse, we made two horses so we needed 2 dowels.
How you make it
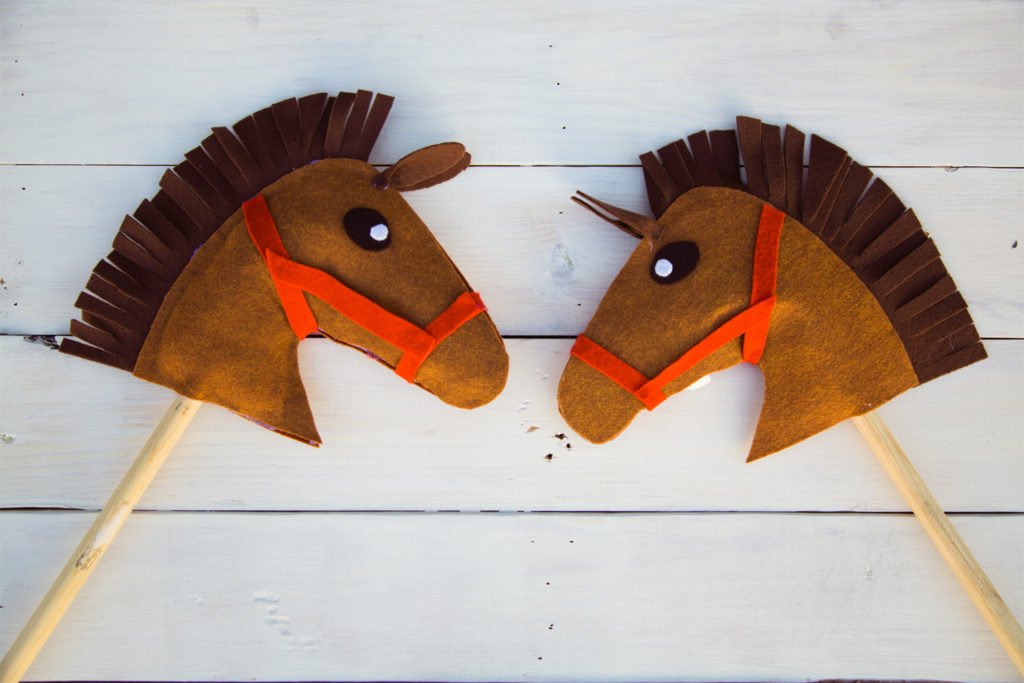
- Print the horse head printable and cut out the shape.
- Pin the horse head template to the 2 medium brown 11 x 17 felt rectangles. (You can put two pieces of felt one directly on the other.)
- Once you have the horse head shape pinned (so it won’t move) to the two felt rectangles you are ready to cut the felt into a horse head shape.
- Now you are ready to make the horse mane! Put the darker rectangle shape in between the two horse heads at an angle.
- Cut a pretty thick mane shape (about 2.5 to 3 inches) that started at the base and stops right at the top of the curve of the horse head
- Once your happy with the mane shape, hot glue it to the inside of one of the horse heads
- Once that is dry, glue the two horse head shapes together leaving the base open to stuff and add the dowel later on.
- Now is a good time to make that mane feel real and give it some fringe! Just cut even strips leaving a little room at the base of the mane.
- Now you are ready for some ears! Cut two long oval shapes that have a straight bottom out of the medium brown felt.
- Take the two corners of the bottom of the ears and glue gun them together
Glue it to one side of the horse head, and repeat this for the other side of the horse head. - Next, the horse eyes! Cut two black circle ovals and two white circles for the eyes then glue gun them just below the ears on each side.
- Now for the red halter! Cut strips of red felt about 1/2 an inch thick and lay it across the horse head, then glue them and cut of any extra felt.
- Now you are ready to stuff your horse head! NOTE: We used tissue, but if you could use cotton balls or pillow stuffing if you happen to have that laying around!
- Fill the head up with tissue, making sure it looked full from the nose all the way to the base.
Before you glue the base shut, add the dowel. - Once the dowel is in, you can glue the base together, make sure you pay extra attention to gluing the dowel to the felt too, this will help make it not fall apart later.
- Now you have a horse to go play with!
Time to horse around!
Now that you’ve got your custom horse DIY to play with, it’s time to have some fun! We rounded up are some games and things you can do with your new horse head, and maybe even use with your Happy Horse Haven Play House!
- Decorate it! Make your horse DIY super custom by decorating it. Take the mane a step further and use yard, or use white felt to color and paint later!
- Horse Course! Set up a small obstacle course and do tricks that horses might actually do at shows or rodeos. This can include jumps, barrels or even lassoing.
- Freeze Gallop! Play this game similar to the traditional version of Freeze Dance. Instead of dancing, kids gallop around or ride hobby horses as the music plays. When the music stops, they must freeze in place. The last horse to freeze is out of the game. The music starts again and galloping continues until the music stops, and they all must freeze again. Keep playing until only one player is left. They are the winner.
- Hula Hoop Lasso! Grab a hula hoop and pick the horse to be lassoed. If you don’t have a large enough space, set up the horse heads on the ground and toss rings over them!
- Set up a grooming station! Ponies love grooming time, so let the girls get a fancy
“pony” tail with ribbons, bows, and braids. The boys will be content with a bandanna, but it’s fun to get creative here!
If the fall weather permits, this Happy Horse Haven Play House, along with the games above also work great outside!
Let us know!
Did you make the horse head DIY? What are some other ways you are battling the indoor blues this fall and winter? Let us know in the comments below!