
Happy Earth Day! We believe that teaching our children to respect our planet is one of the most important lessons we can impart. Every small action has a big impact on our future so whether it’s picking up trash in a local park, making sure to recycle canned goods, or starting a backyard vegetable garden, there has never been a better time to celebrate Mother Earth. Today we are taking inspiration from our Tea Party Garden House Tent and sharing how to make your own DIY planter box in honor of the home.
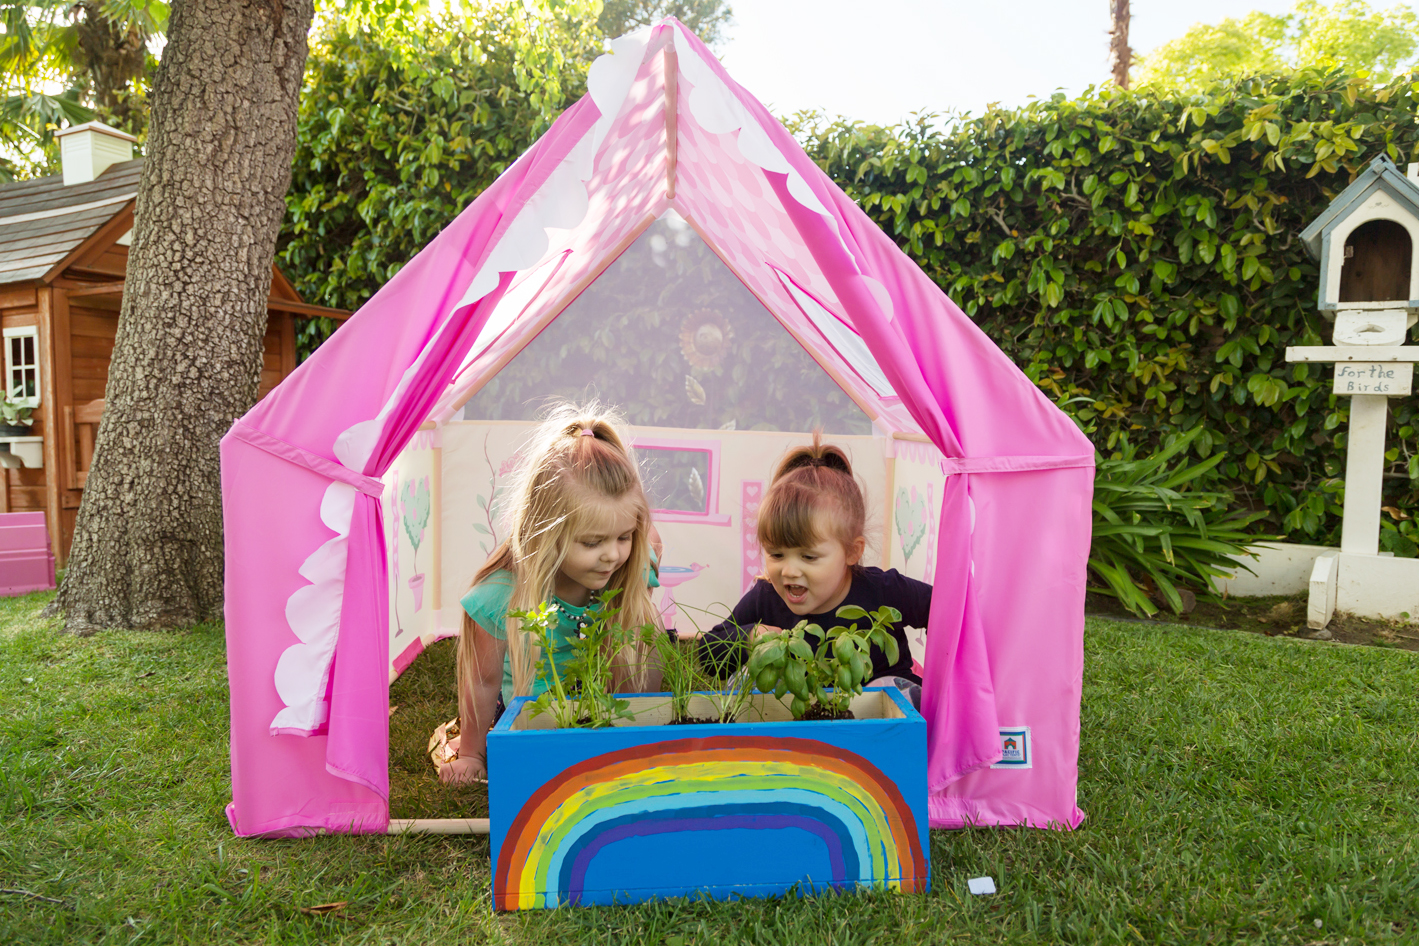
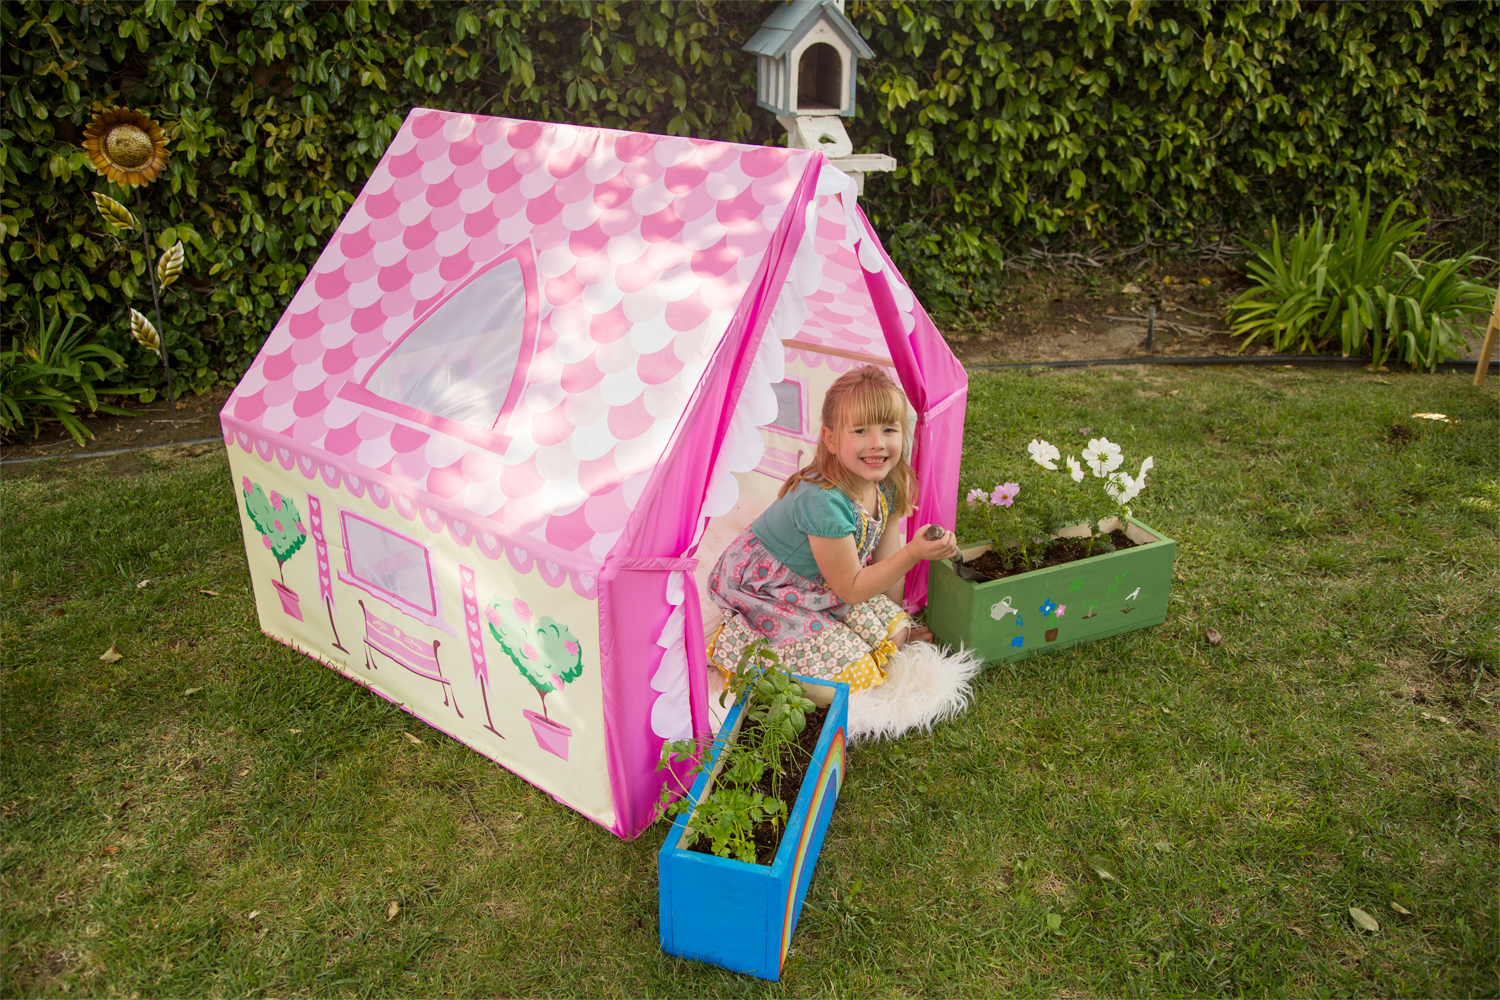
Featuring colorful, house-inspired designs and airy mesh windows, the Tea Party Garden House Tent is a breeze to assemble during this bountiful time of year. This house is made with high-quality peach skin fabric and sturdy wooden poles. It has great ventilation with our no-see-um mesh and with a purposefully designed wide front door. We also left the floor without fabric so kids can bring table and chairs or little bikes inside without the legs or wheels getting caught in the fabric.
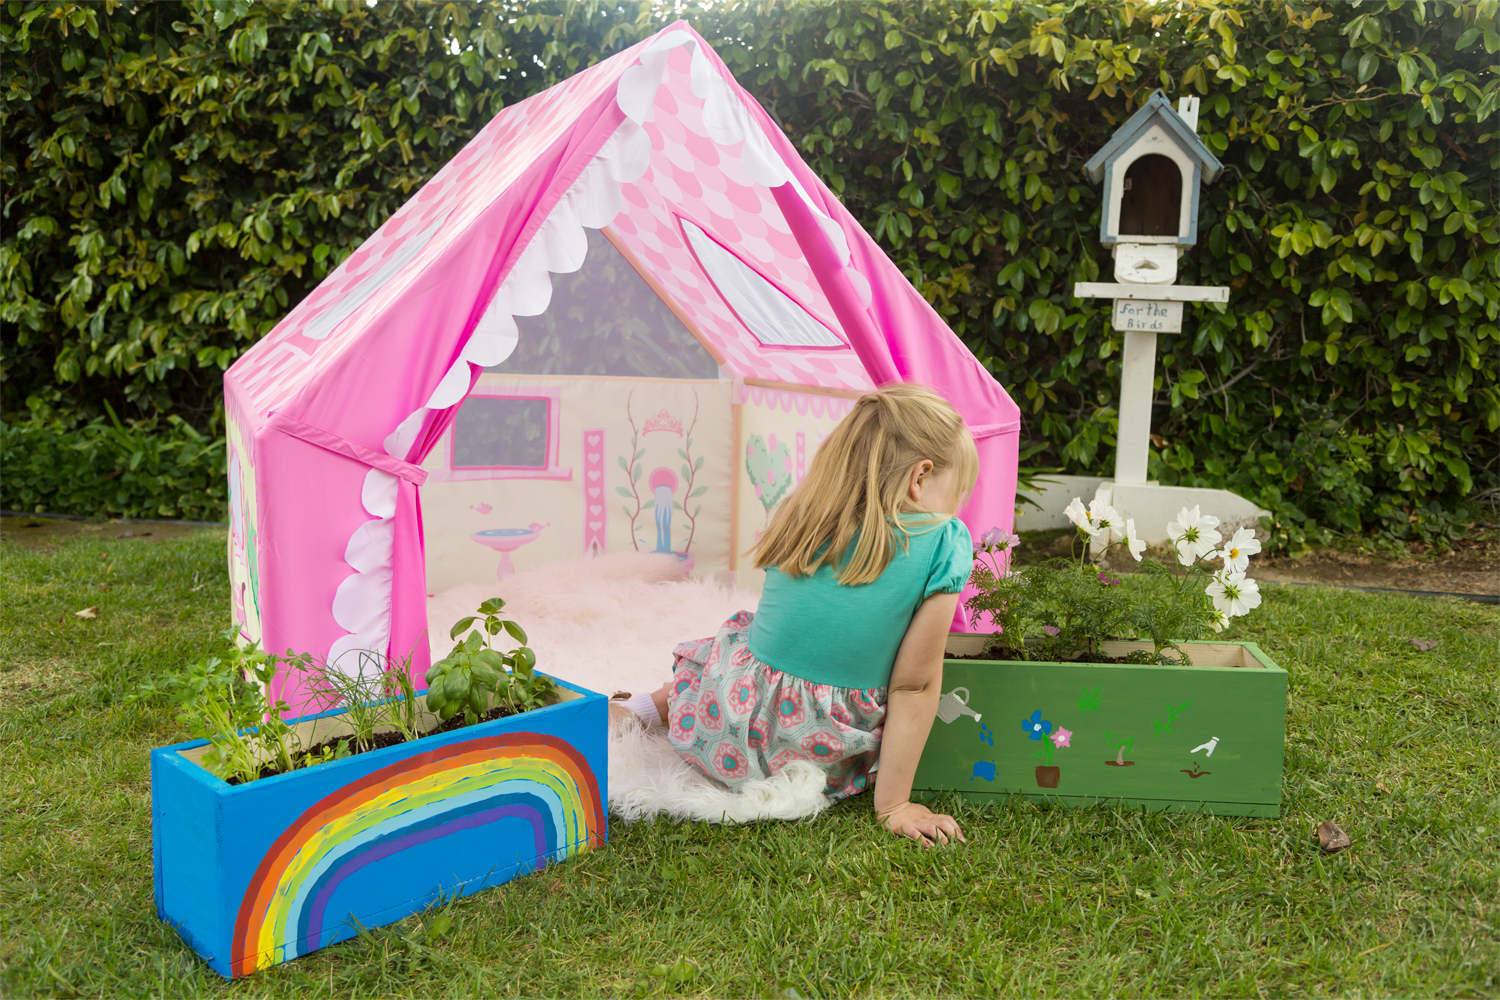
Whether it’s Earth Day or any other day, this tent is ideal for bringing the beauty of nature into the comforts of “home.”
There’s no better place to cultivate a green thumb than in our Tea Party Garden House Tent!
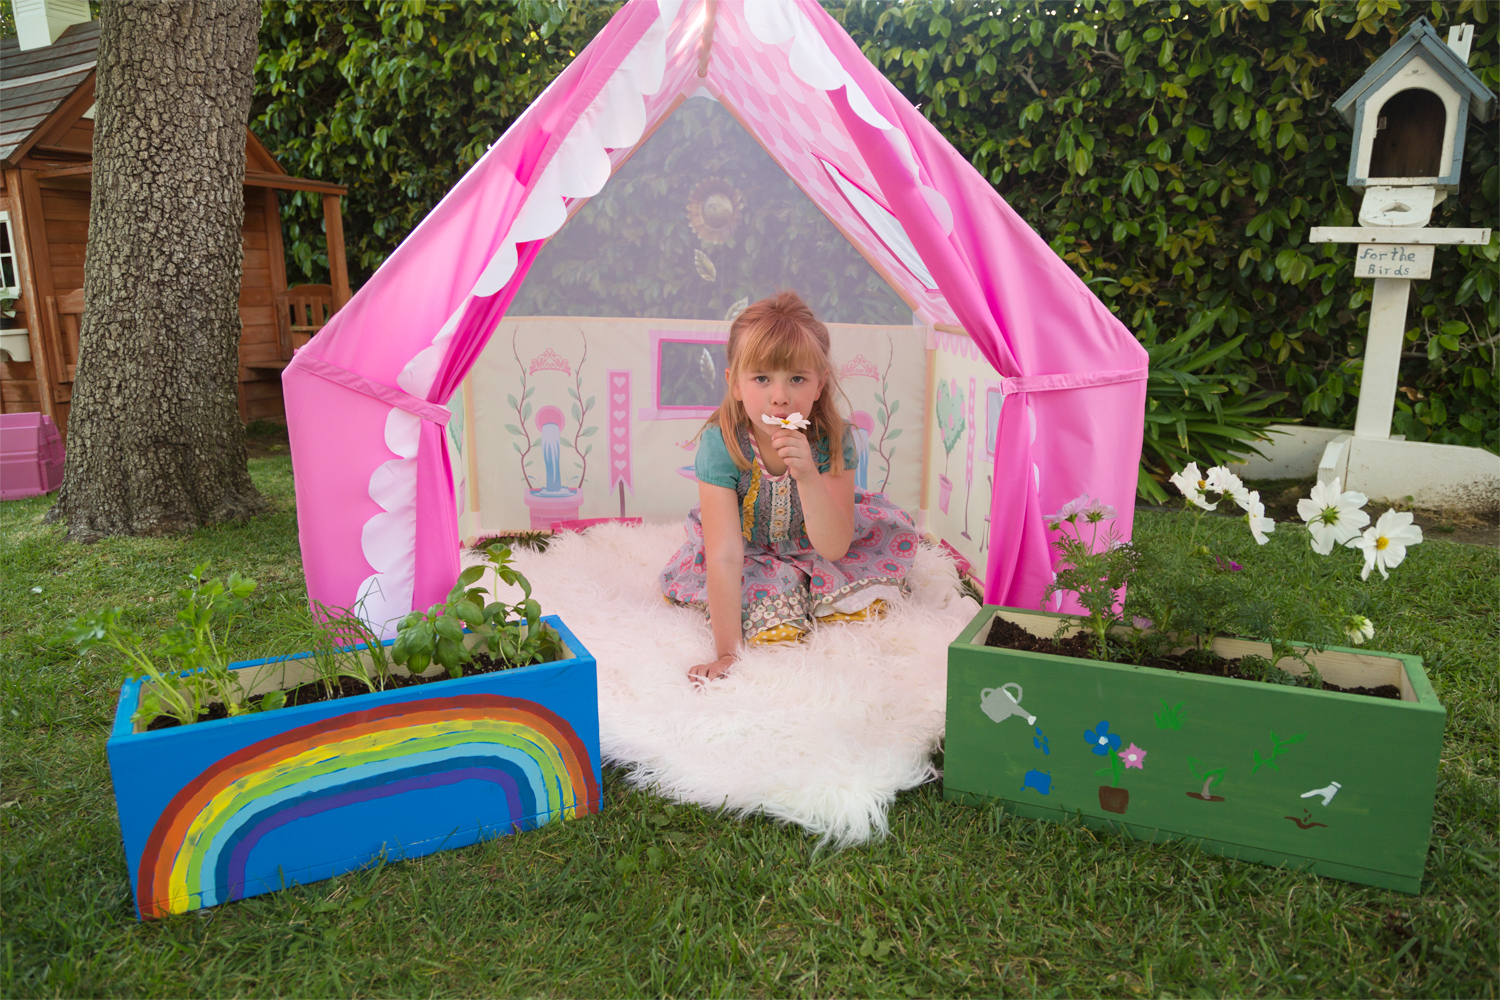
At 43″ x 43″ x 45″ high, there’s plenty of room for your child and their closest friends to tend to their gardens and watch Mother Nature work her magic.
Here’s what you’ll need to create your own DIY planter boxes just in time for Earth Day:
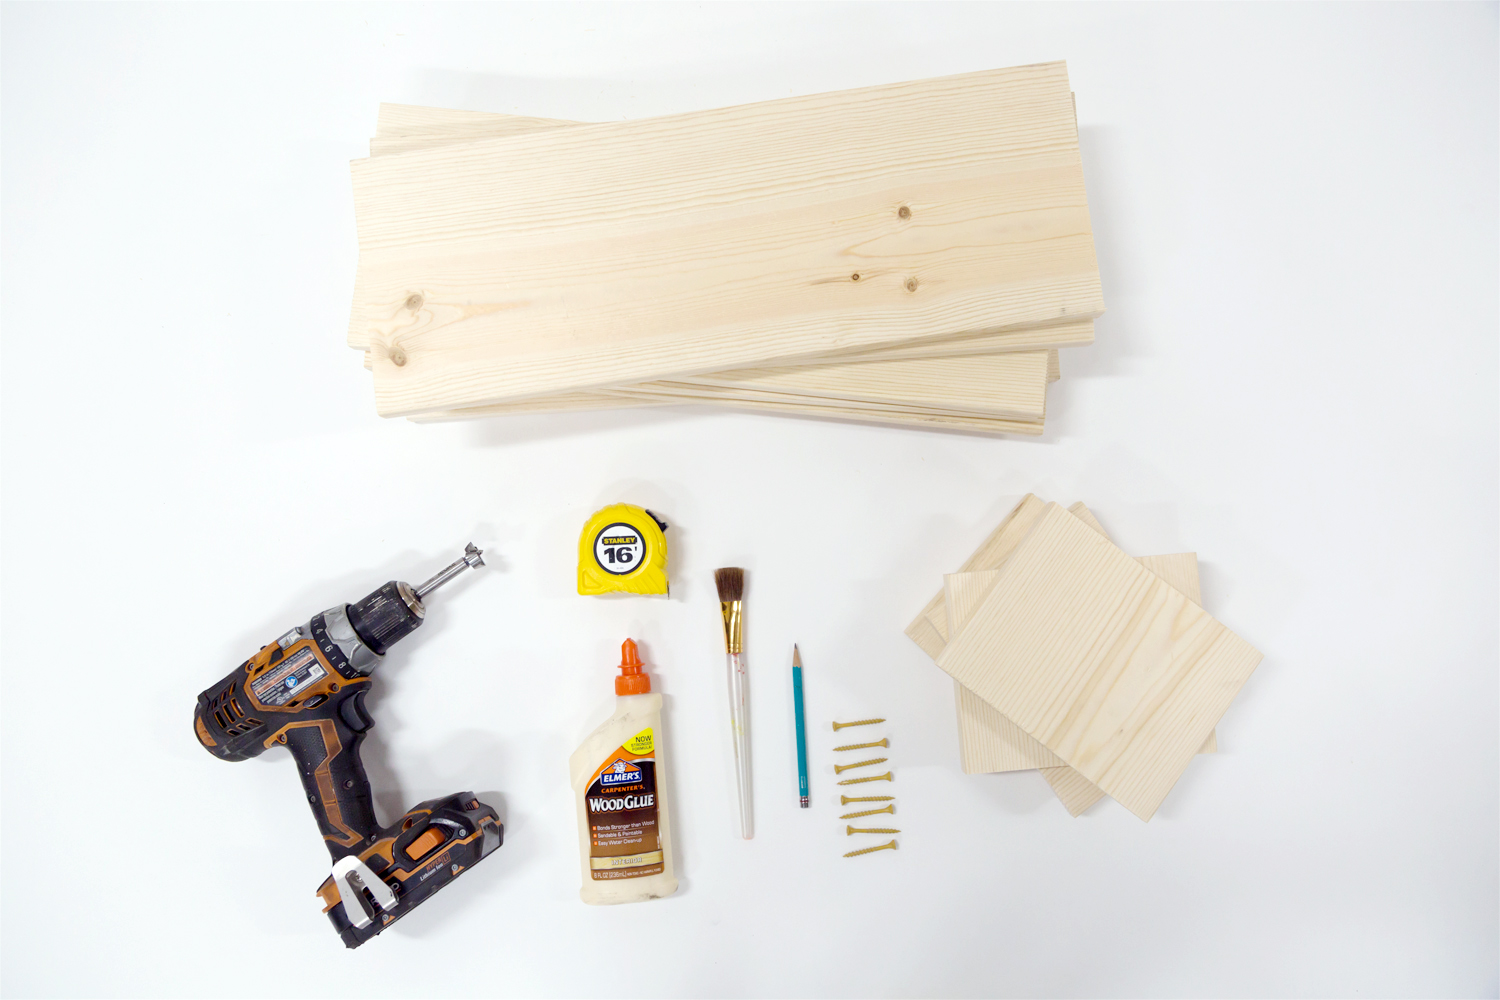
SUPPLIES:
- Three 6″ x 20″ pine wood planks
- Two 6″ x 7″ x 2″ pine wood planks
- Wood glue
- Tape Measure
- Drill with 1 5/8″ bit
- 1 5/8″ screws
- Paint
- Paintbrush
- Pencil
INSTRUCTIONS:
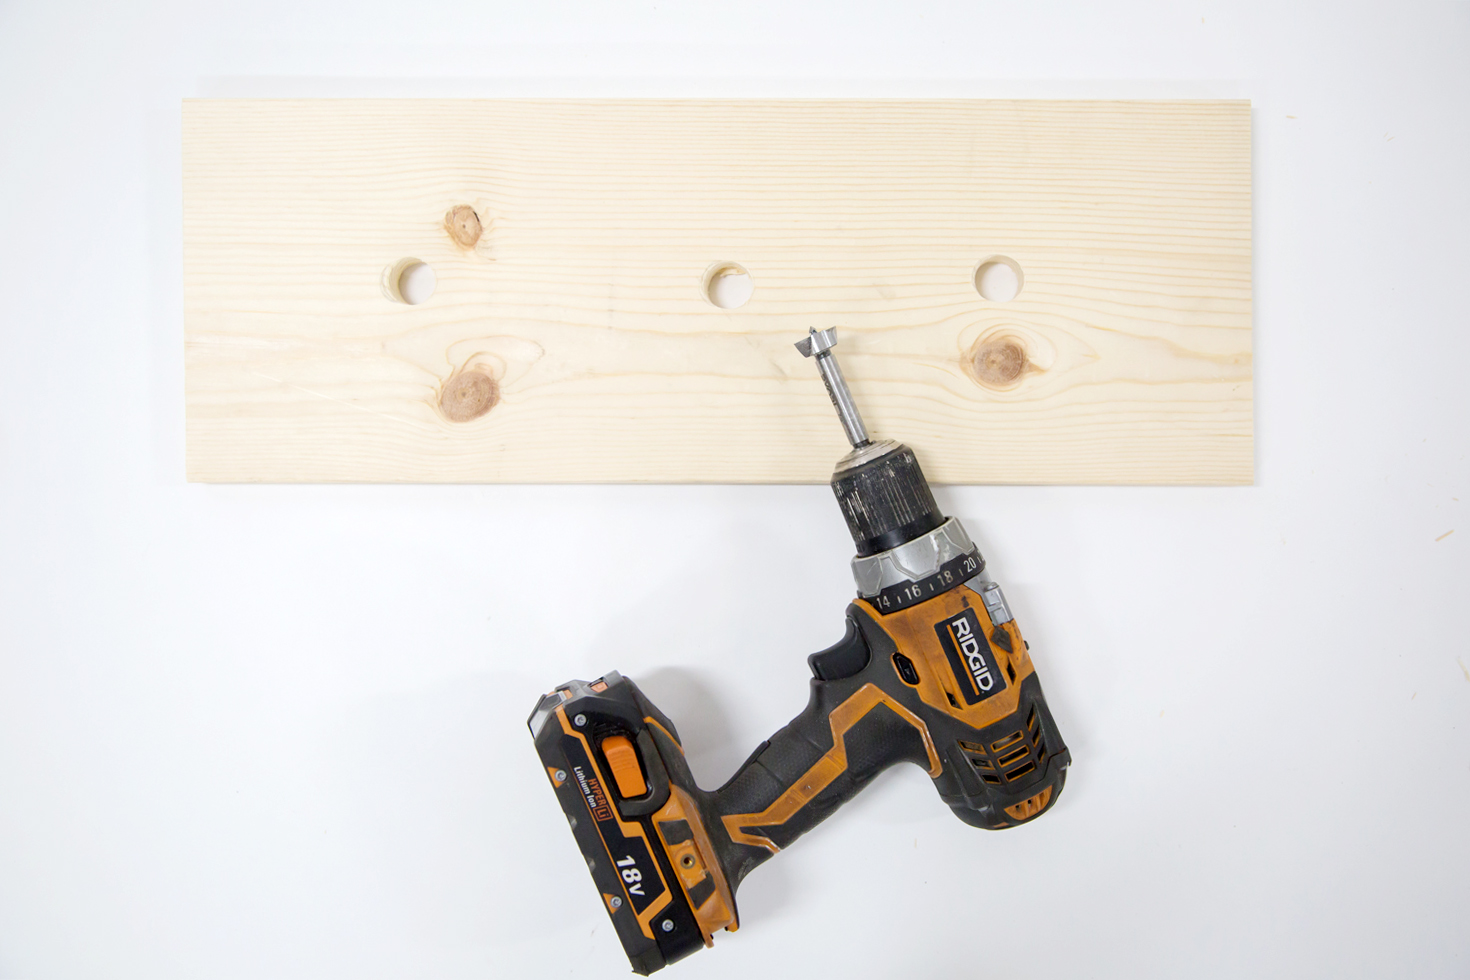
Drill three 1” holes in the bottom plank for drainage. Make hole marks at 5,” 10,” and 16” in the middle of the bottom planks, we made two boxes, so there are six holes in all, on two bottom planks.

Once the drainage holes are made, apply wood glue along the bottom edges of the plank with the holes and add the two longer sides. Paint the two smaller pieces with wood glue on all three sides except the top and add it to the box. Allow the wood glue to dry for an hour.
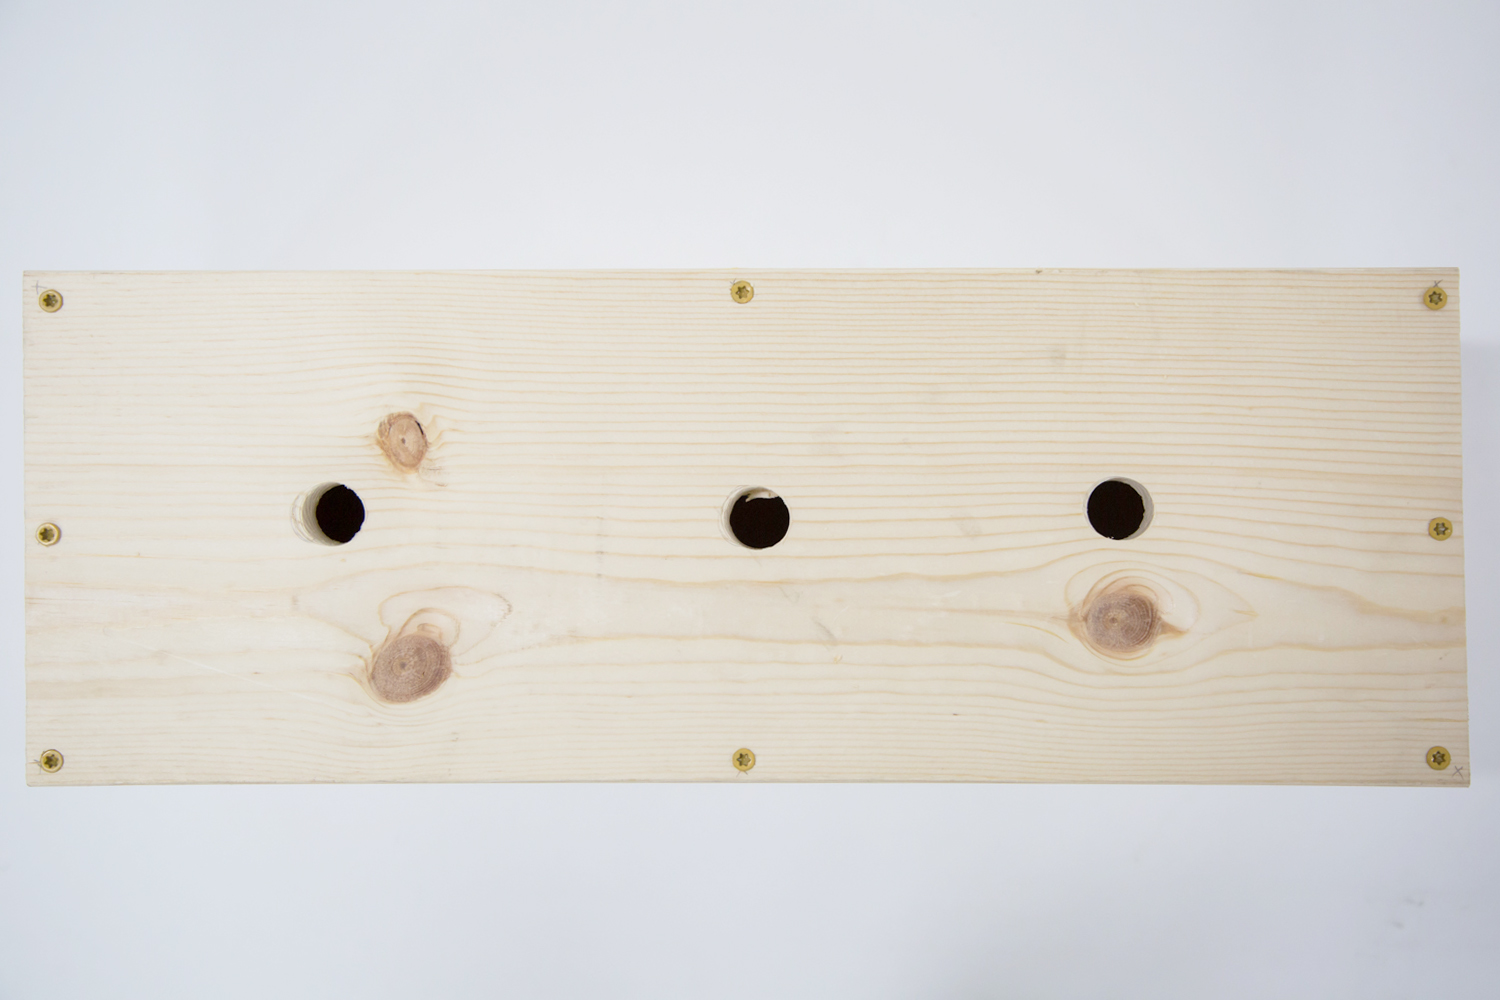
Turn the glued garden box upside down so you can see your drainage holes. Drill eight holes on the bottom of the boxes using a 1 5/8″ drill bit and then screw in the nails.

Finally, add a coat (or two) of paint and let dry. Then decorate however you wish!
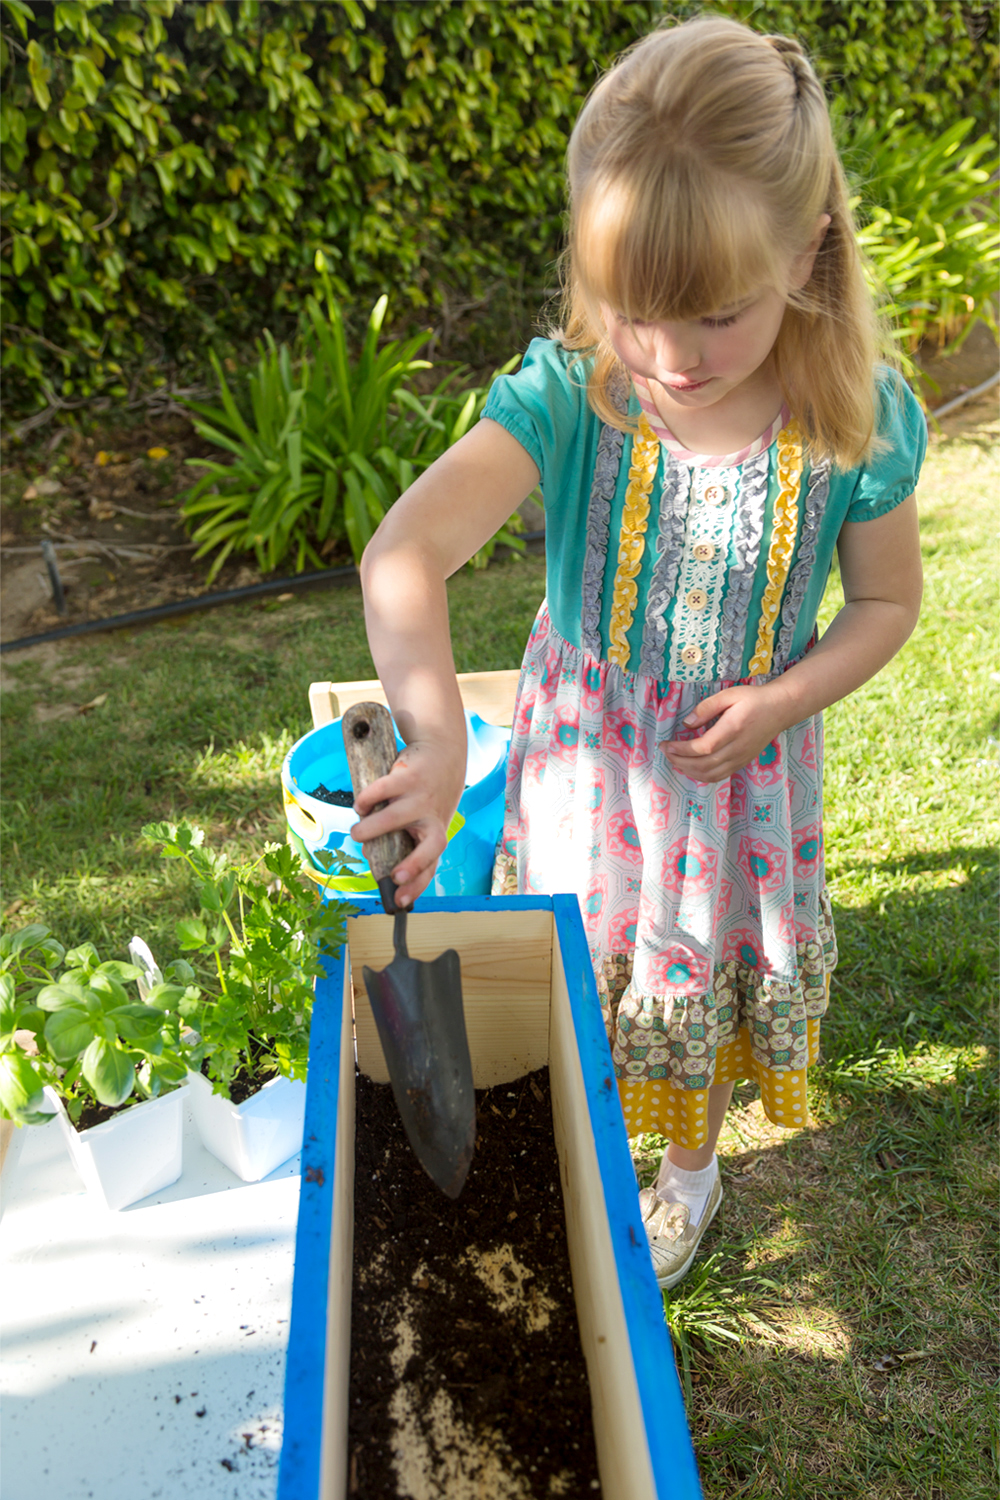
Once the boxes are made, begin the planting process!
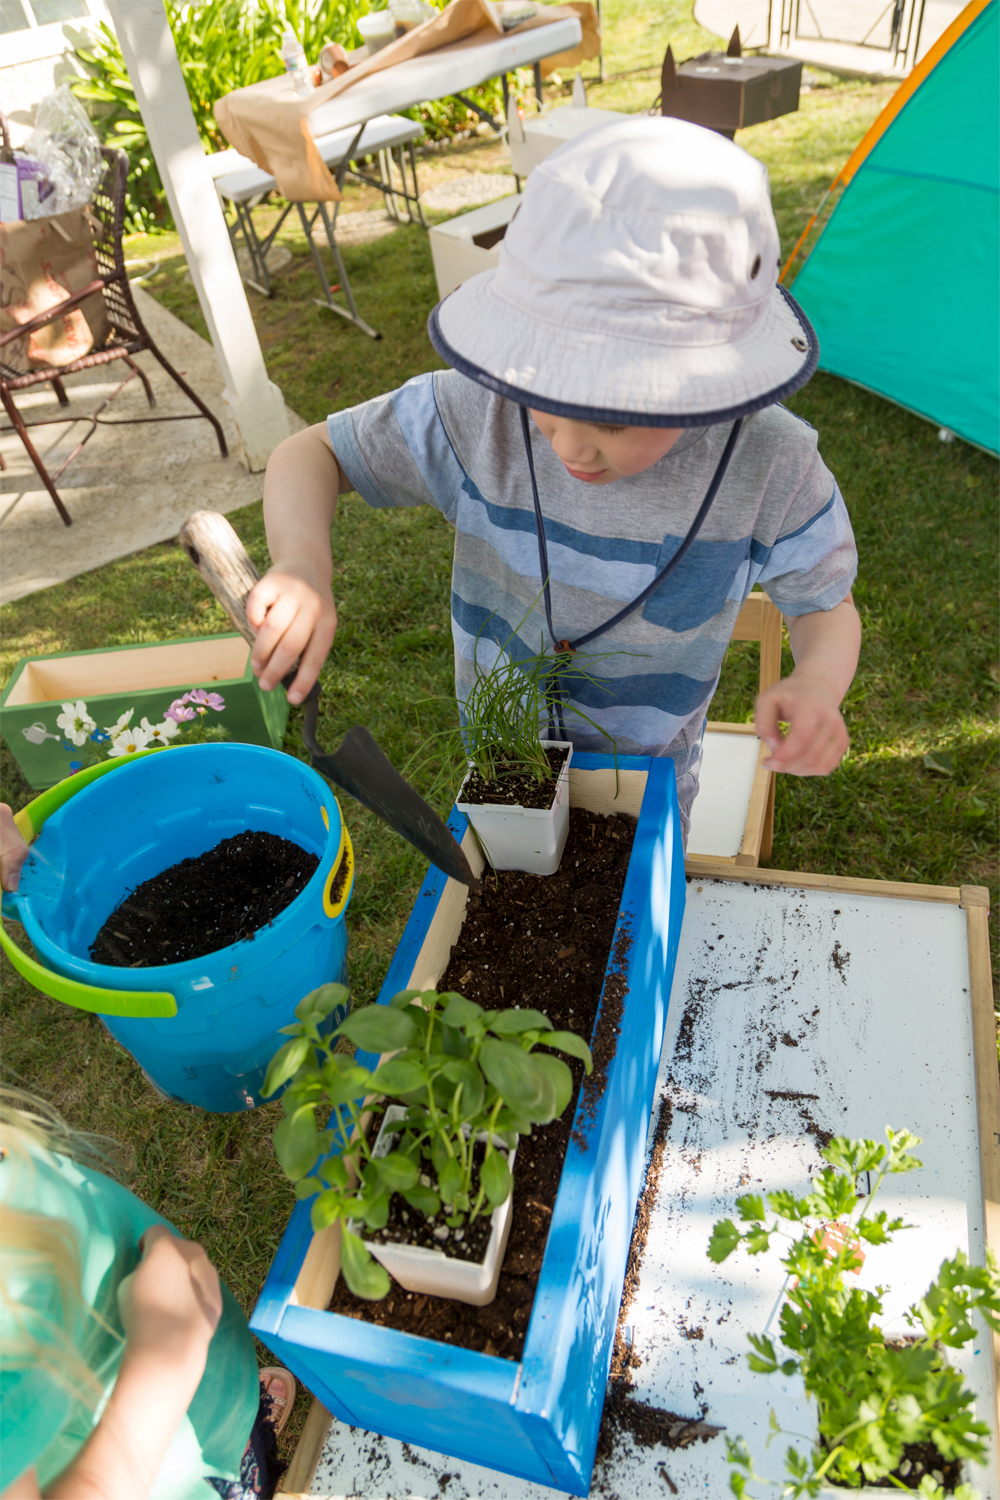
Start by filling the bottom portion of the box with soil. Spread it out evenly using a shovel.
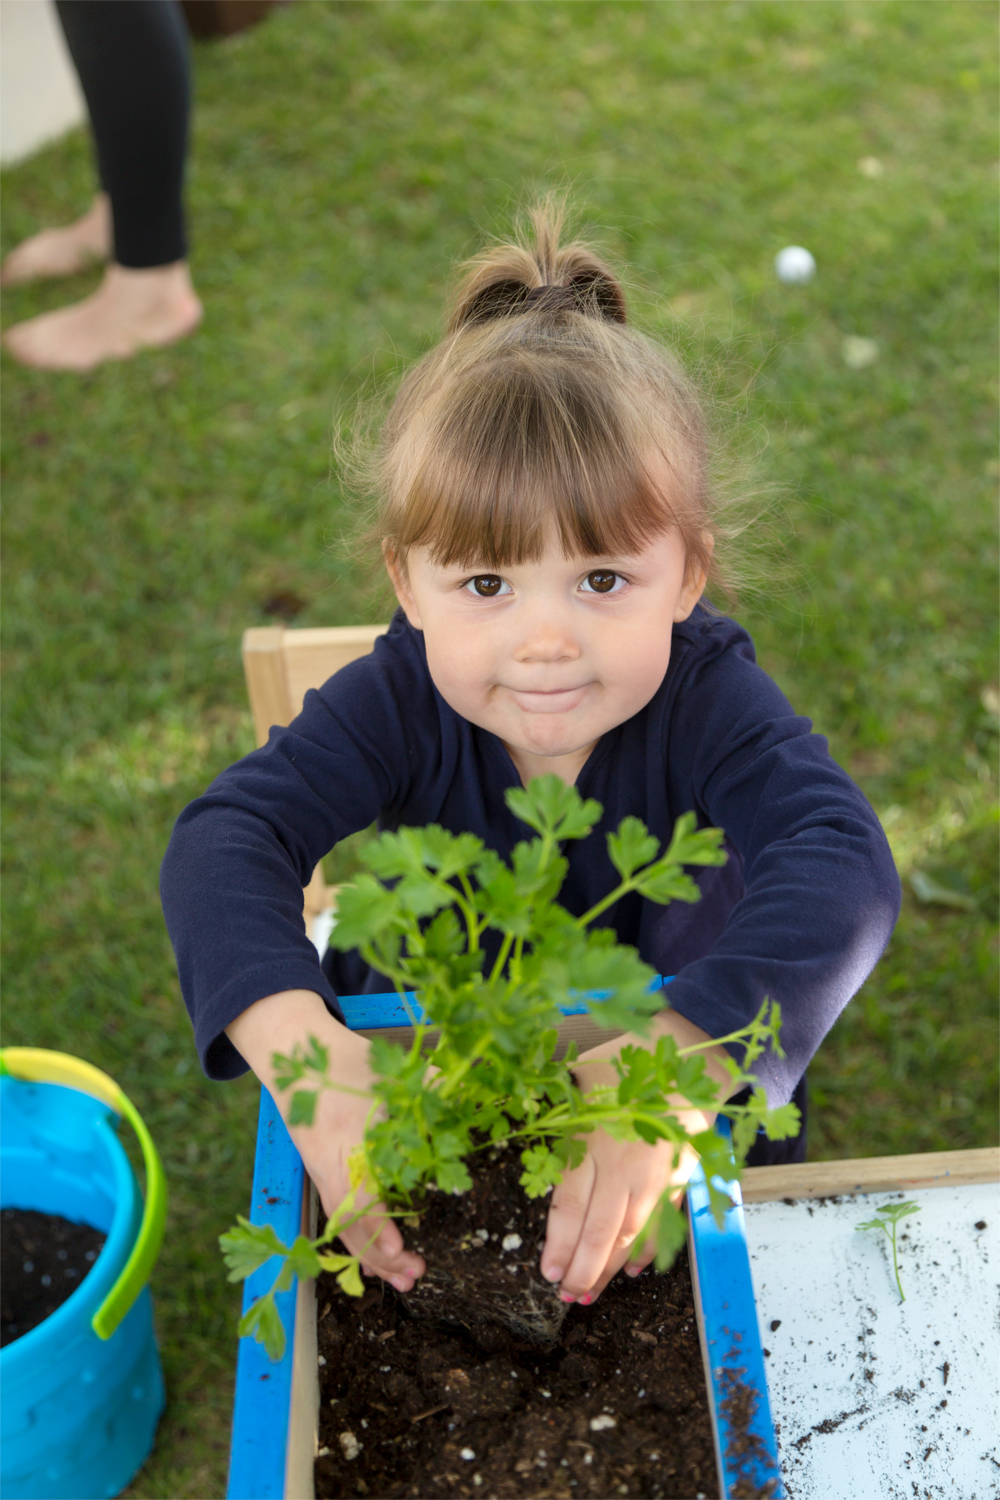
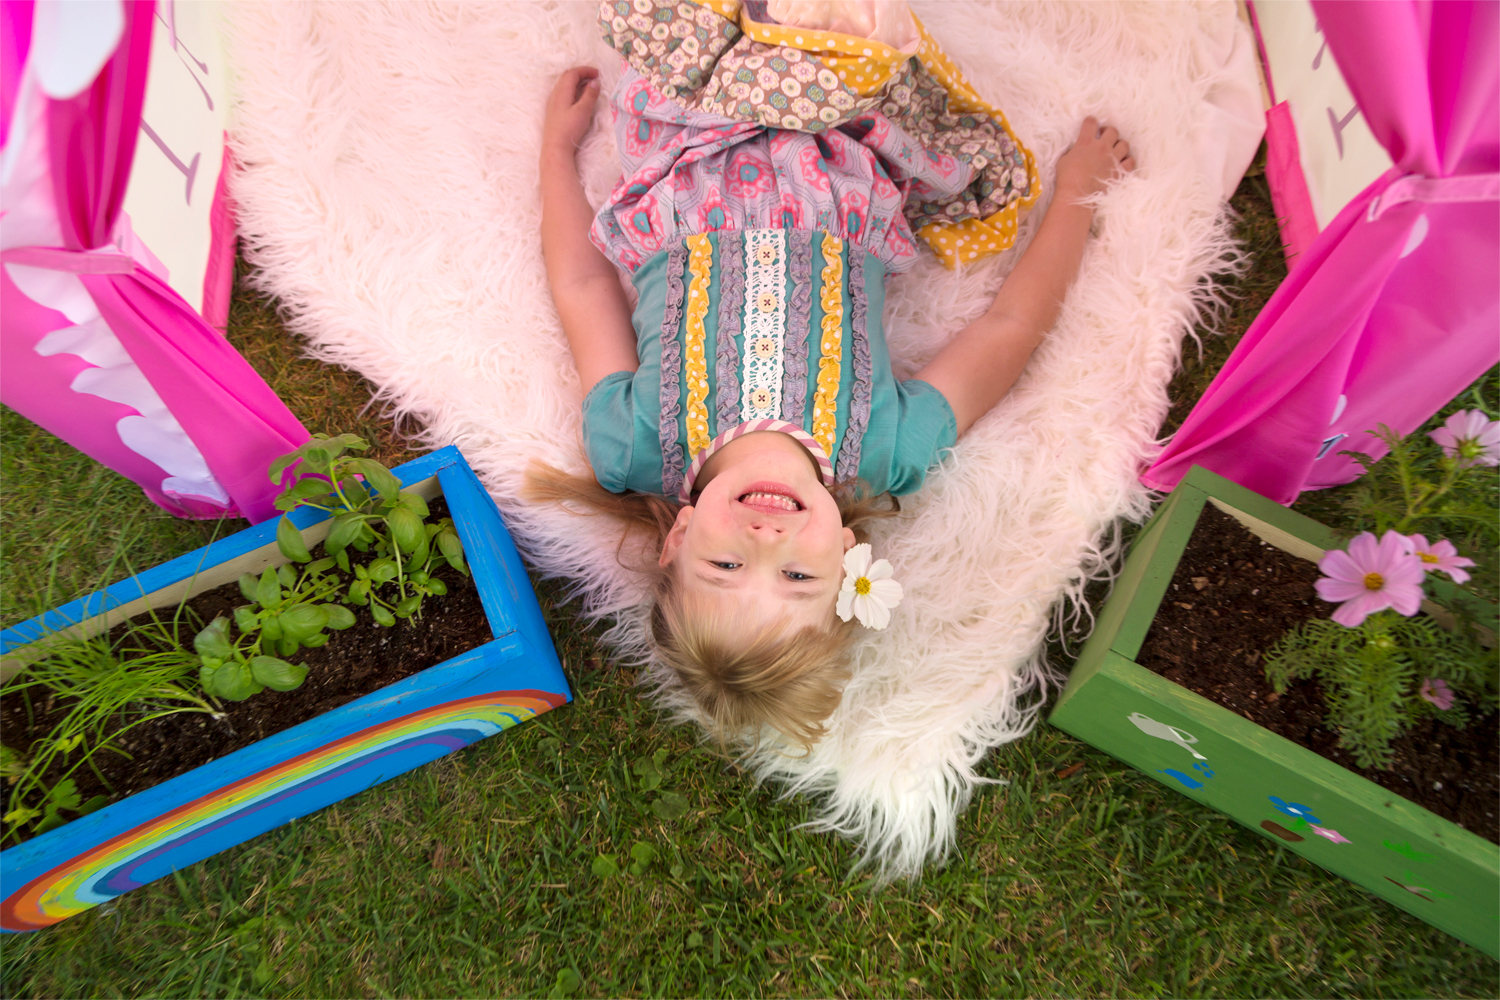
Next, place a few plants into the box, making sure to spread them out equally. For this particular project we made one garden box for flowers and the other for herbs. We planted parsley, basil and chives.
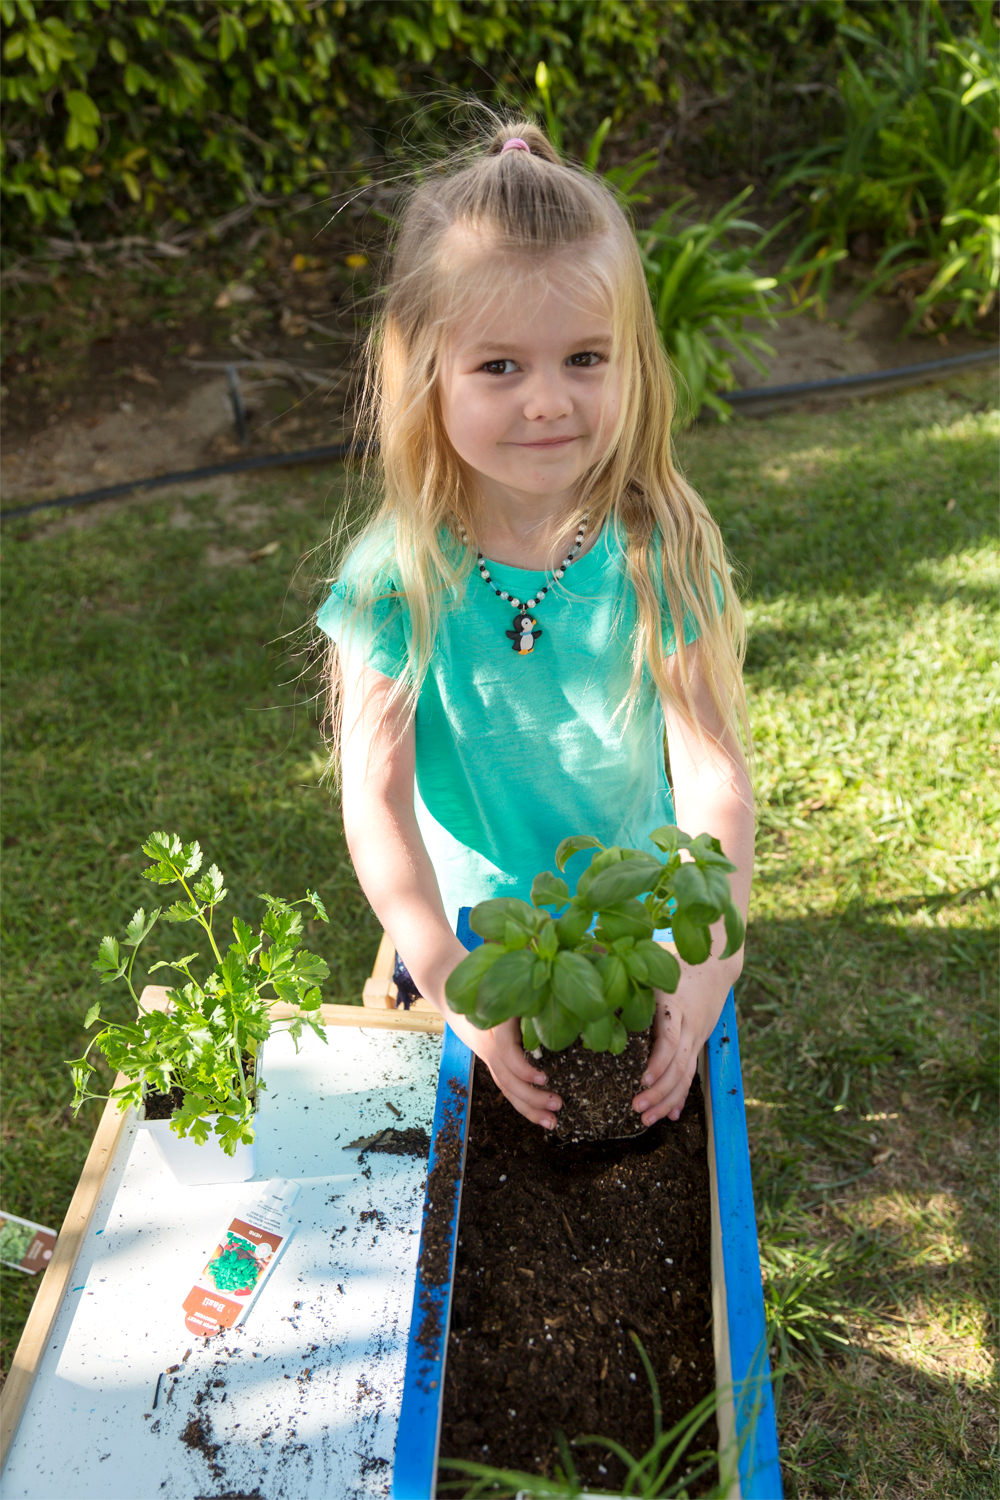
Finally, cover the roots of the plants with more soil and enjoy bountiful harvests year after year! We gave out garden boxes to the parents and model of the home we were shooting at and they were delighted to get these pretty flower/herb boxes to round out the rest of their day!
Here are a few other ideas to consider while building planter boxes:
- If you don’t want to paint, you can use clear coat of outdoor polyurethane instead.
- You can add a protective layer of heavy duty plastic and staple gun it to the inside of the planter box to protect the wood from water damage. You will need to poke holes through the plastic for drainage.
- You can also add very small rocks at the bottom of the wood planters for better drainage.
We hope this tutorial inspires you to take one small action each day to better our beautiful world. Happy Earth Day!