
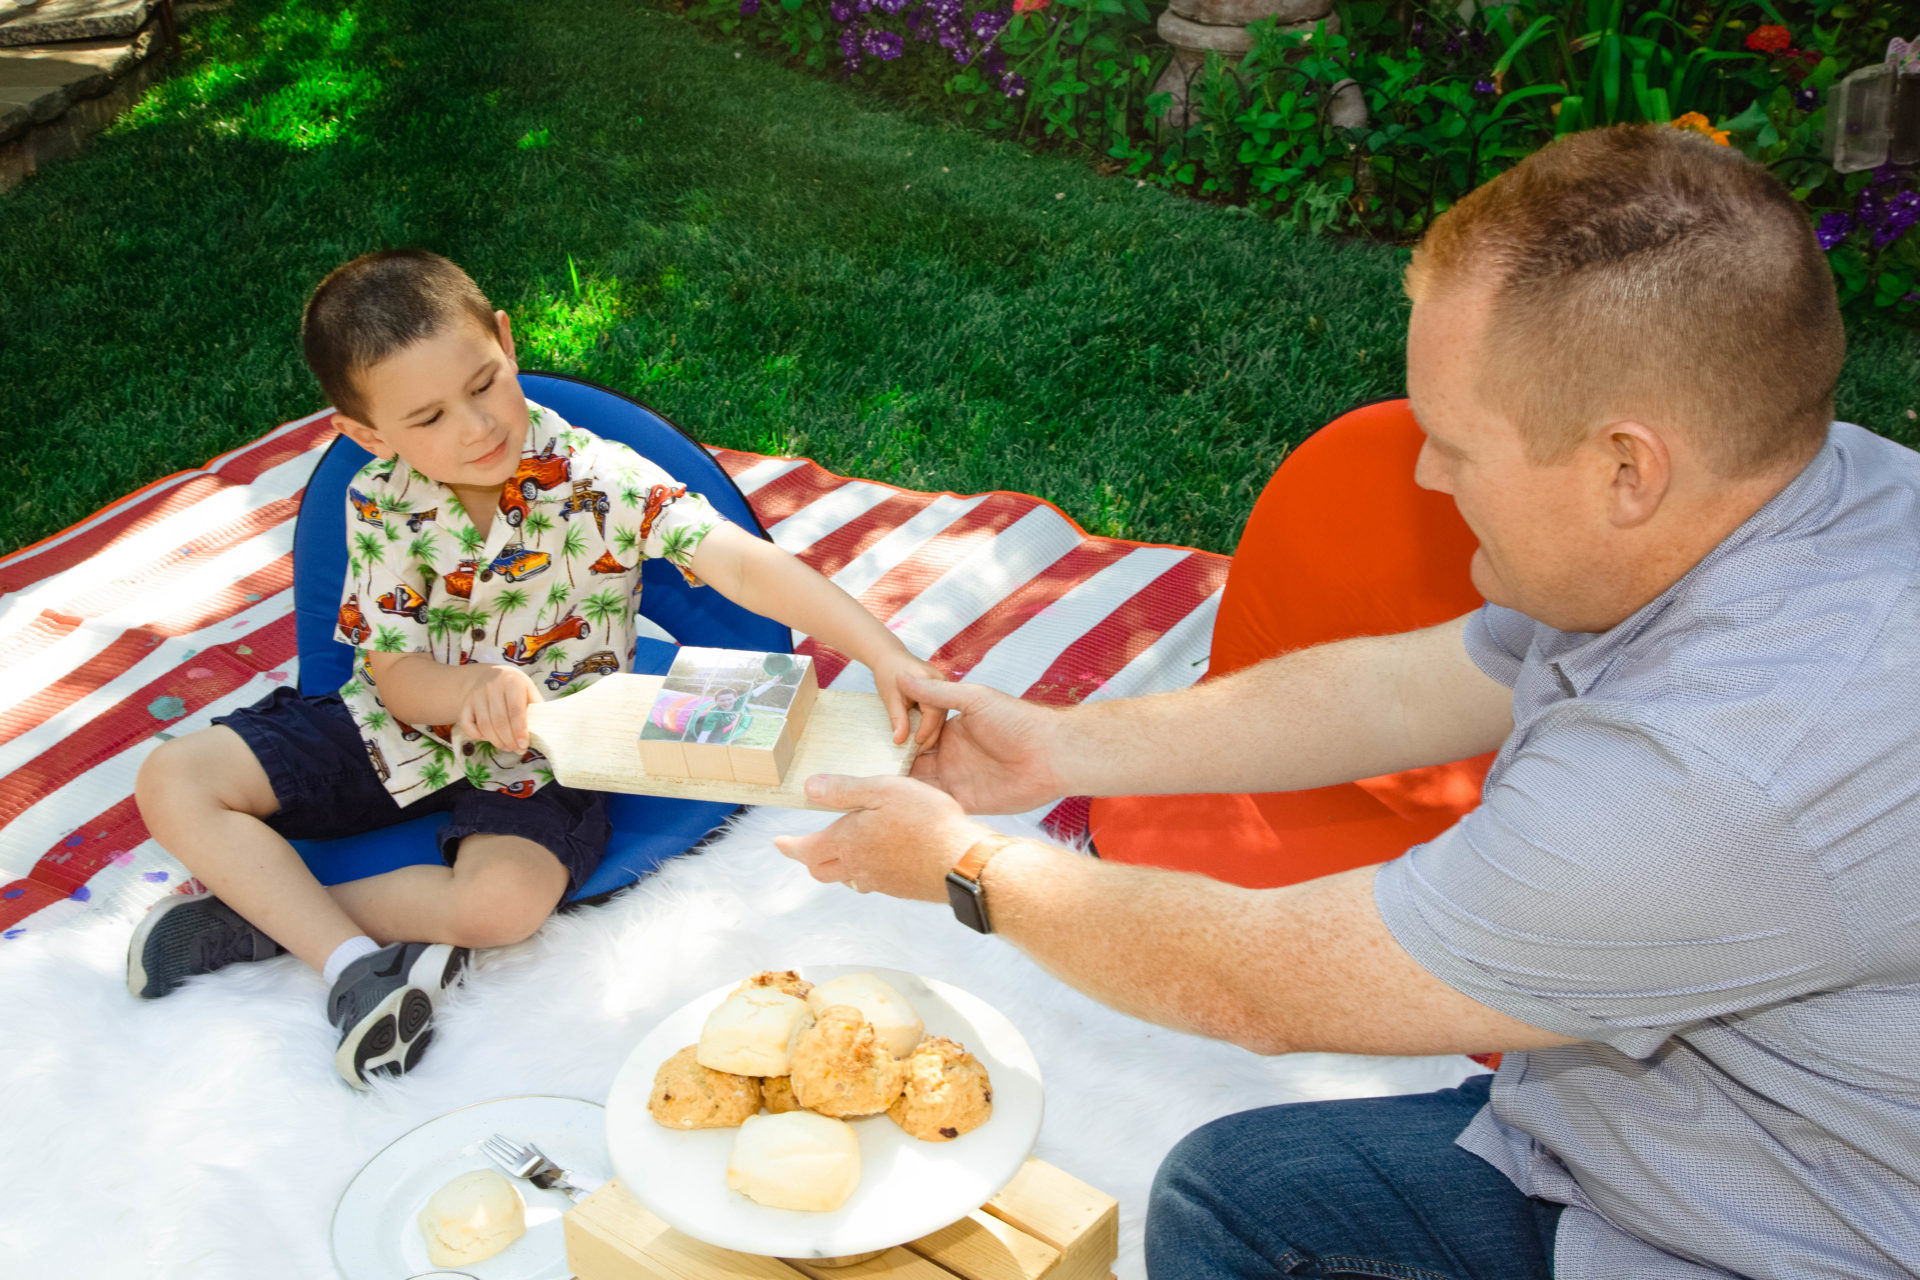
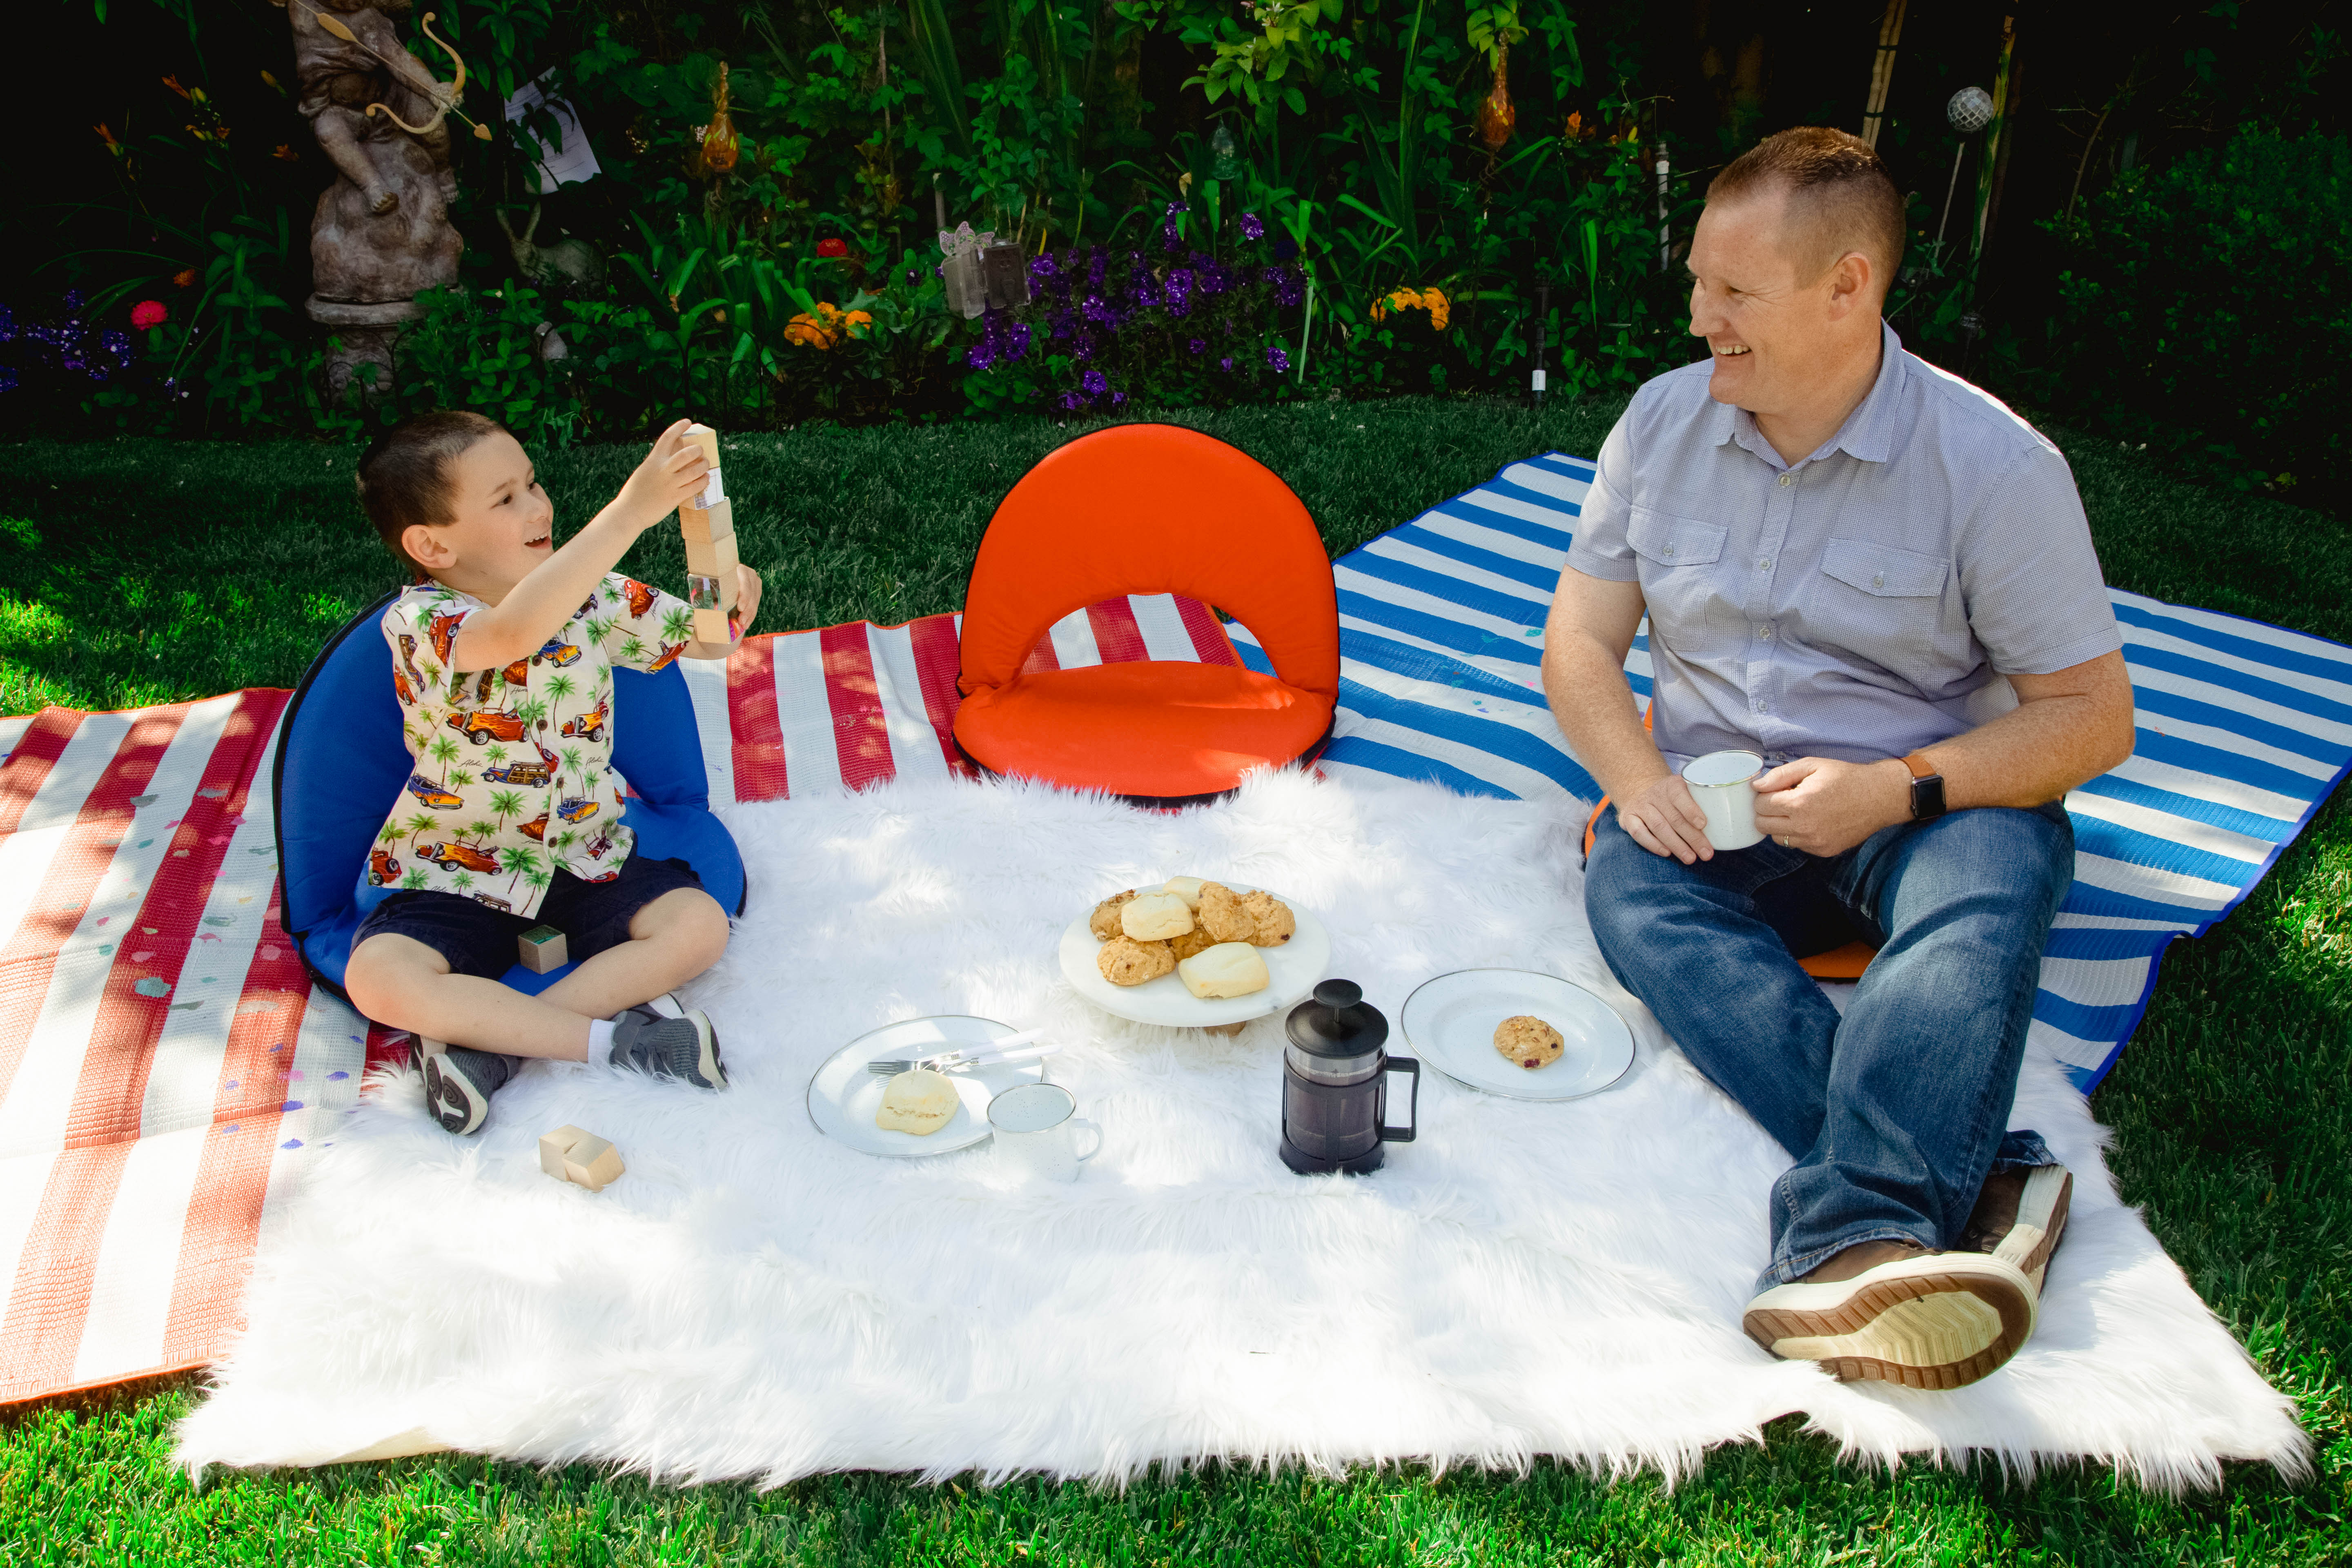
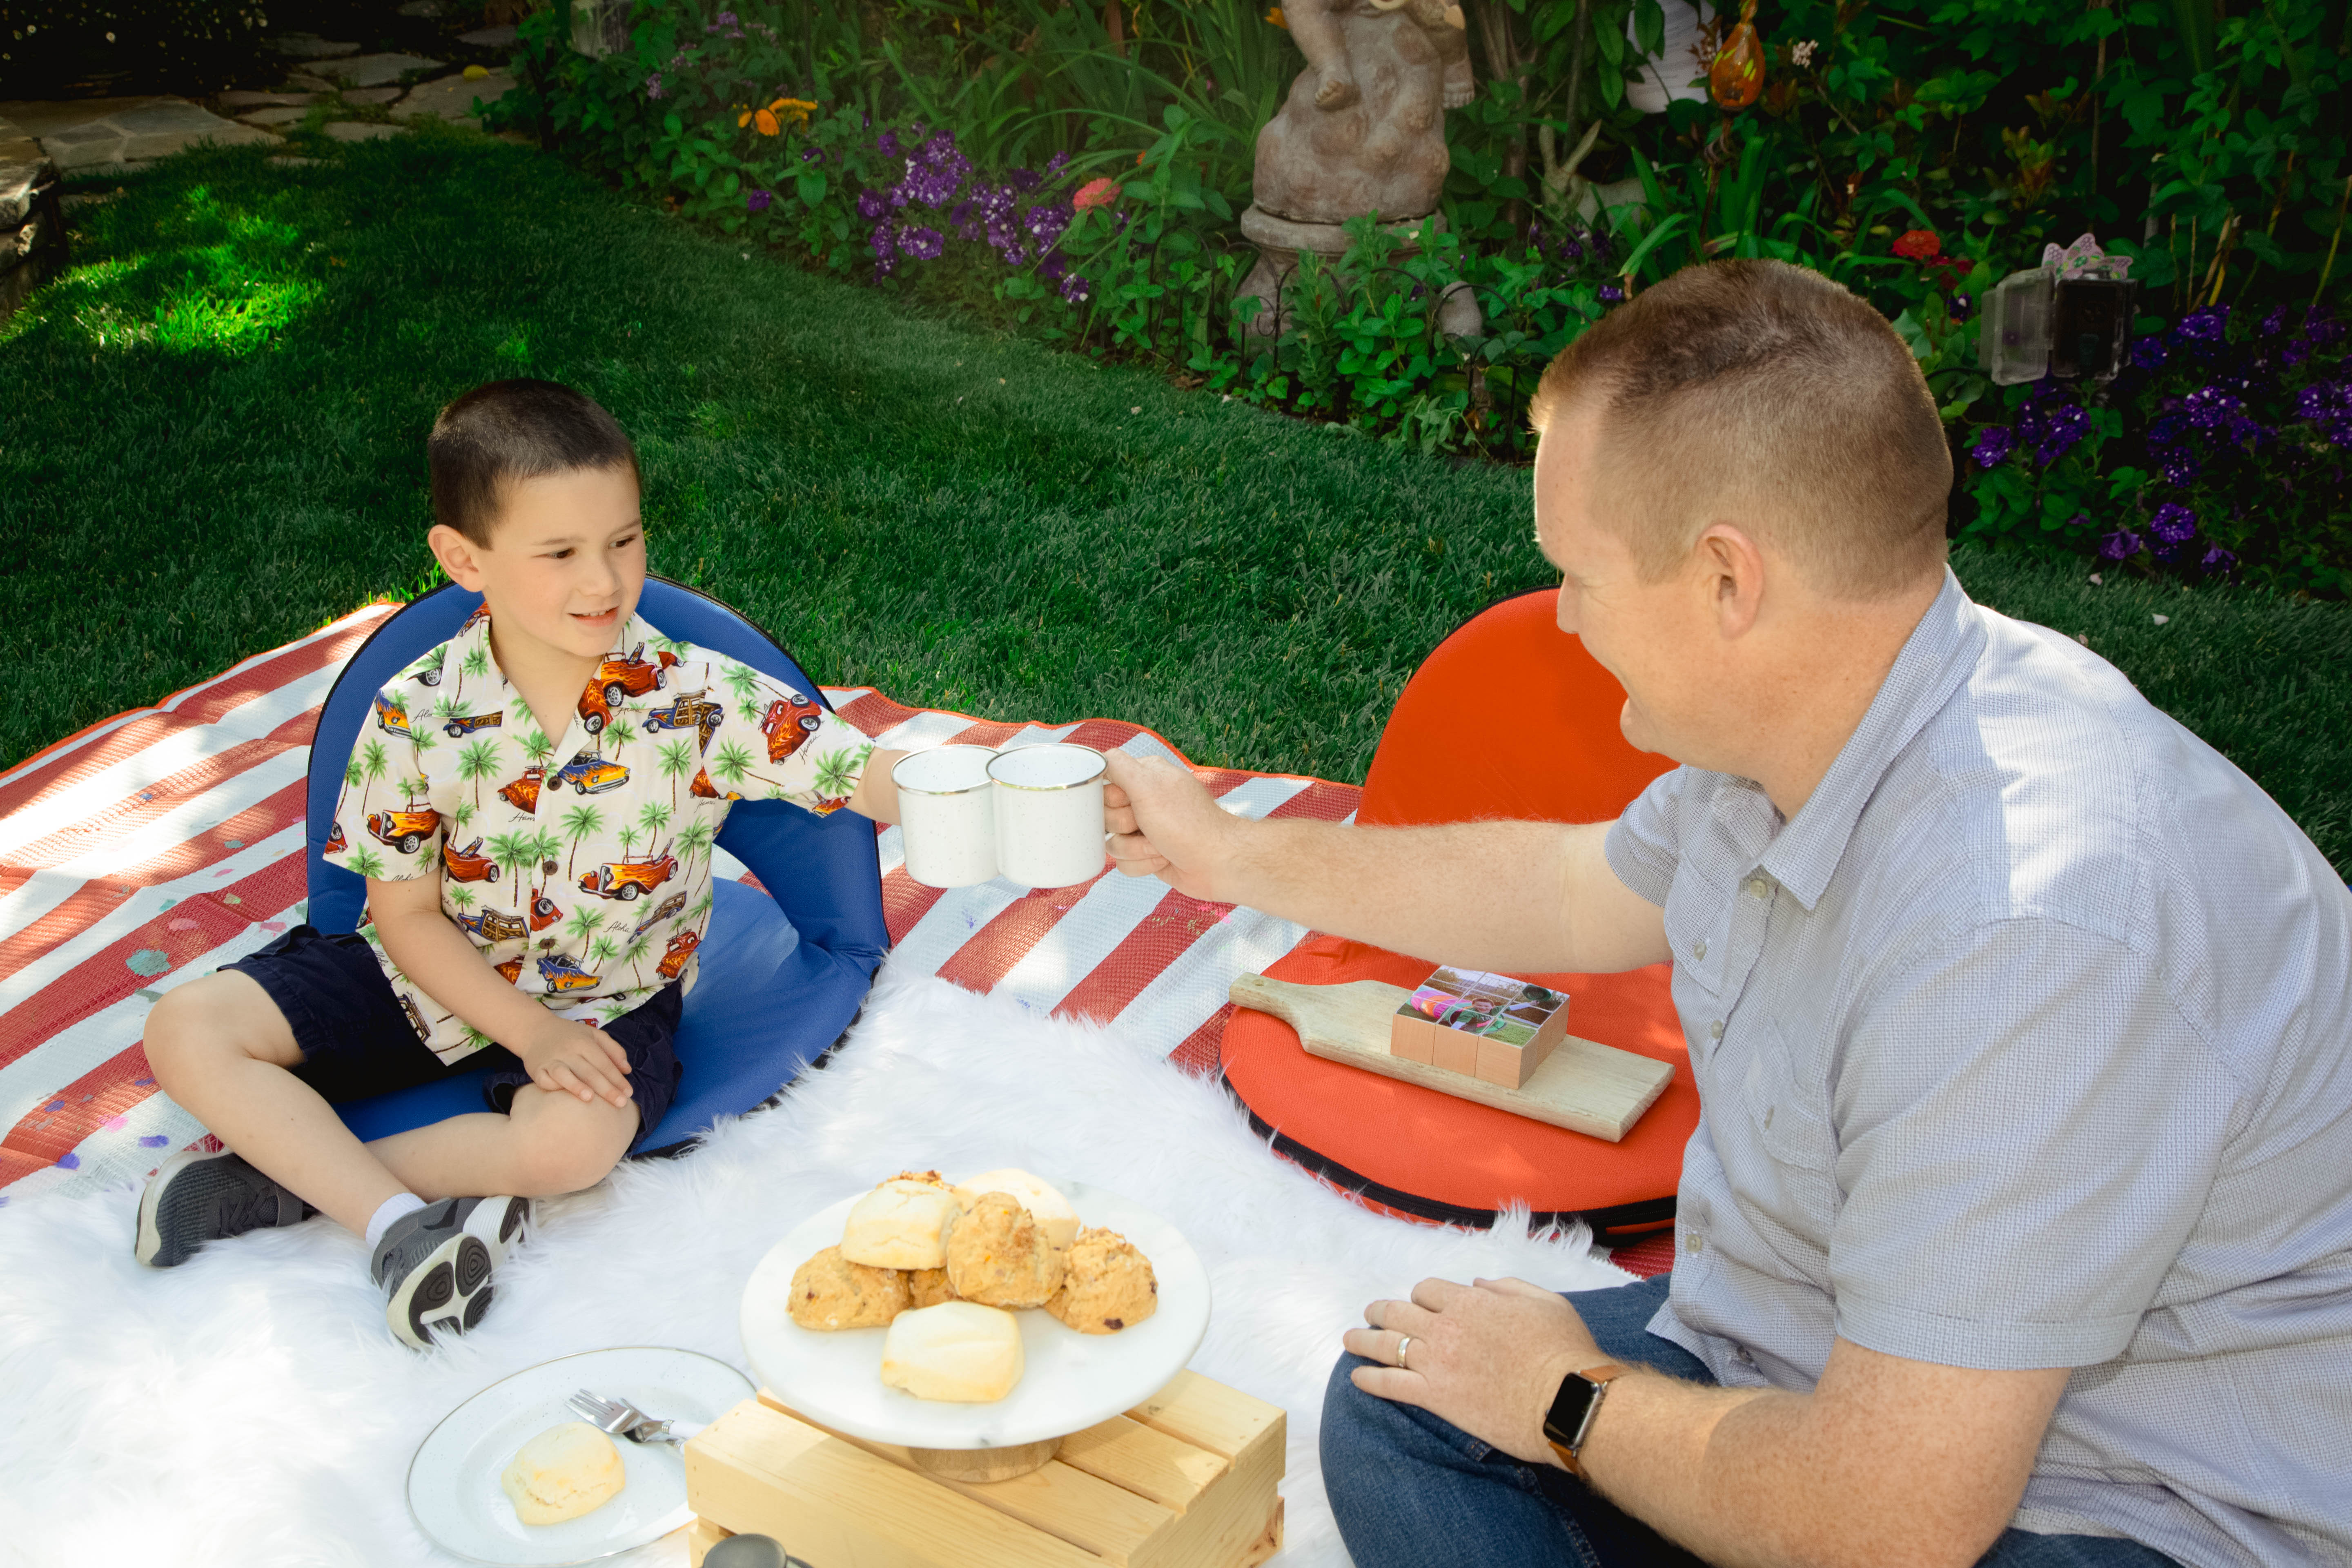
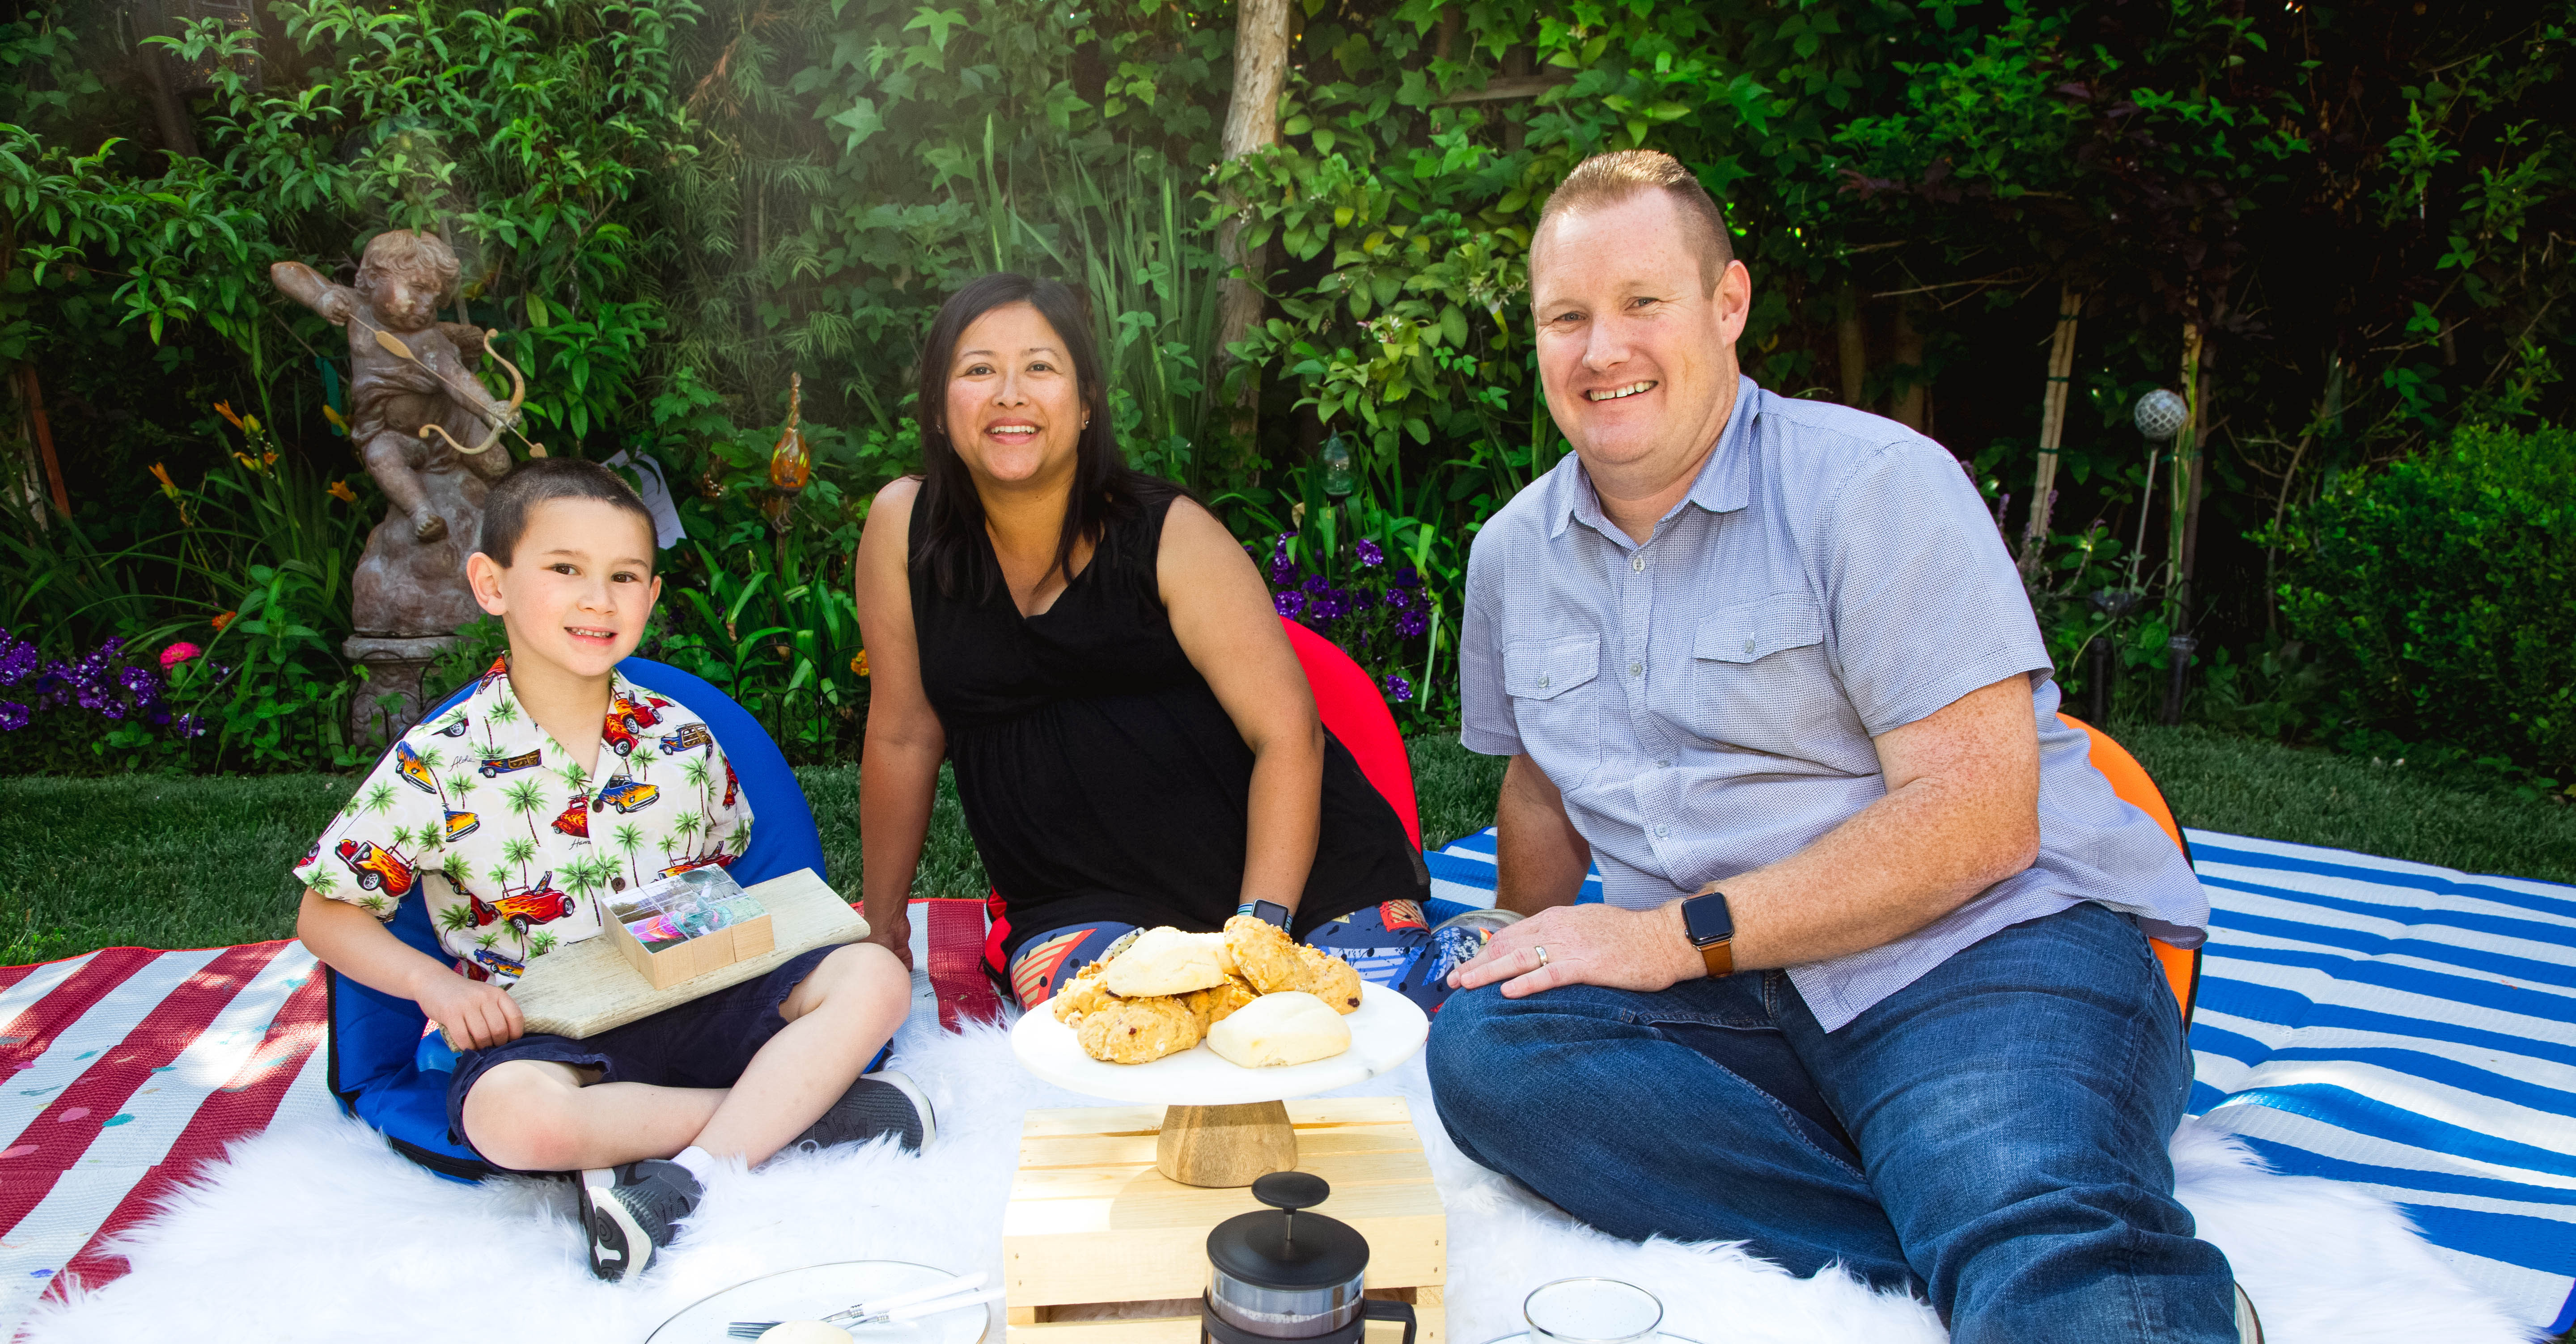
Happy Father’s Day! It’s hard to believe it’s already this time of year again and that we’re half way through the year. Time to get the family together this Sunday and celebrate the most important man in your little one’s life – their Daddy! The biggest problem that tends to happen with Father’s Day is that Dads are, unfortunately, notoriously difficult to gift shop for. This is especially true for Father’s Day (rather than Christmas or their birthdays) when the only products being pushed are things for grilling and for wearing to work. Luckily, we found this awesome craft you can do with your little one to make Father’s Day a little more meaningful, special and personal this year rather than picking up another new grilling spatula – it’s the Father’s Day DIY Photo Puzzle! We decided to have a Sunday breakfast picnic using our teacher chairs to make sitting on the ground comfortable for the adults and especially the dad’s! The picnic was a great time to give the DIY photo puzzle to dad!
Father’s Day DIY Photo Puzzle
This is such a fun DIY to create together because not only is it super easy, but the end result has such a nice big impact that Dad will love! It’s creative and not just another framed family photo to add to the collection. Dad can keep it in the house or take it to the office and always have his favorite people on his mind.
What you’ll need
- A 4.5” x 4.5” copy of your favorite family photo
- NOTE: If you decide to resize the photo yourself in Photoshop and print, here are some guidelines:
- Make sure the mode is at CMYK (rather than RGB)
- Make sure the resolution is set for 300
- Print on 32lb paper (just a step up from regular paper, yet not as thick as card stock)
- We prefer matte or satin finishes but you can use what ever finish you prefer.
- NOTE: If you decide to resize the photo yourself in Photoshop and print, here are some guidelines:
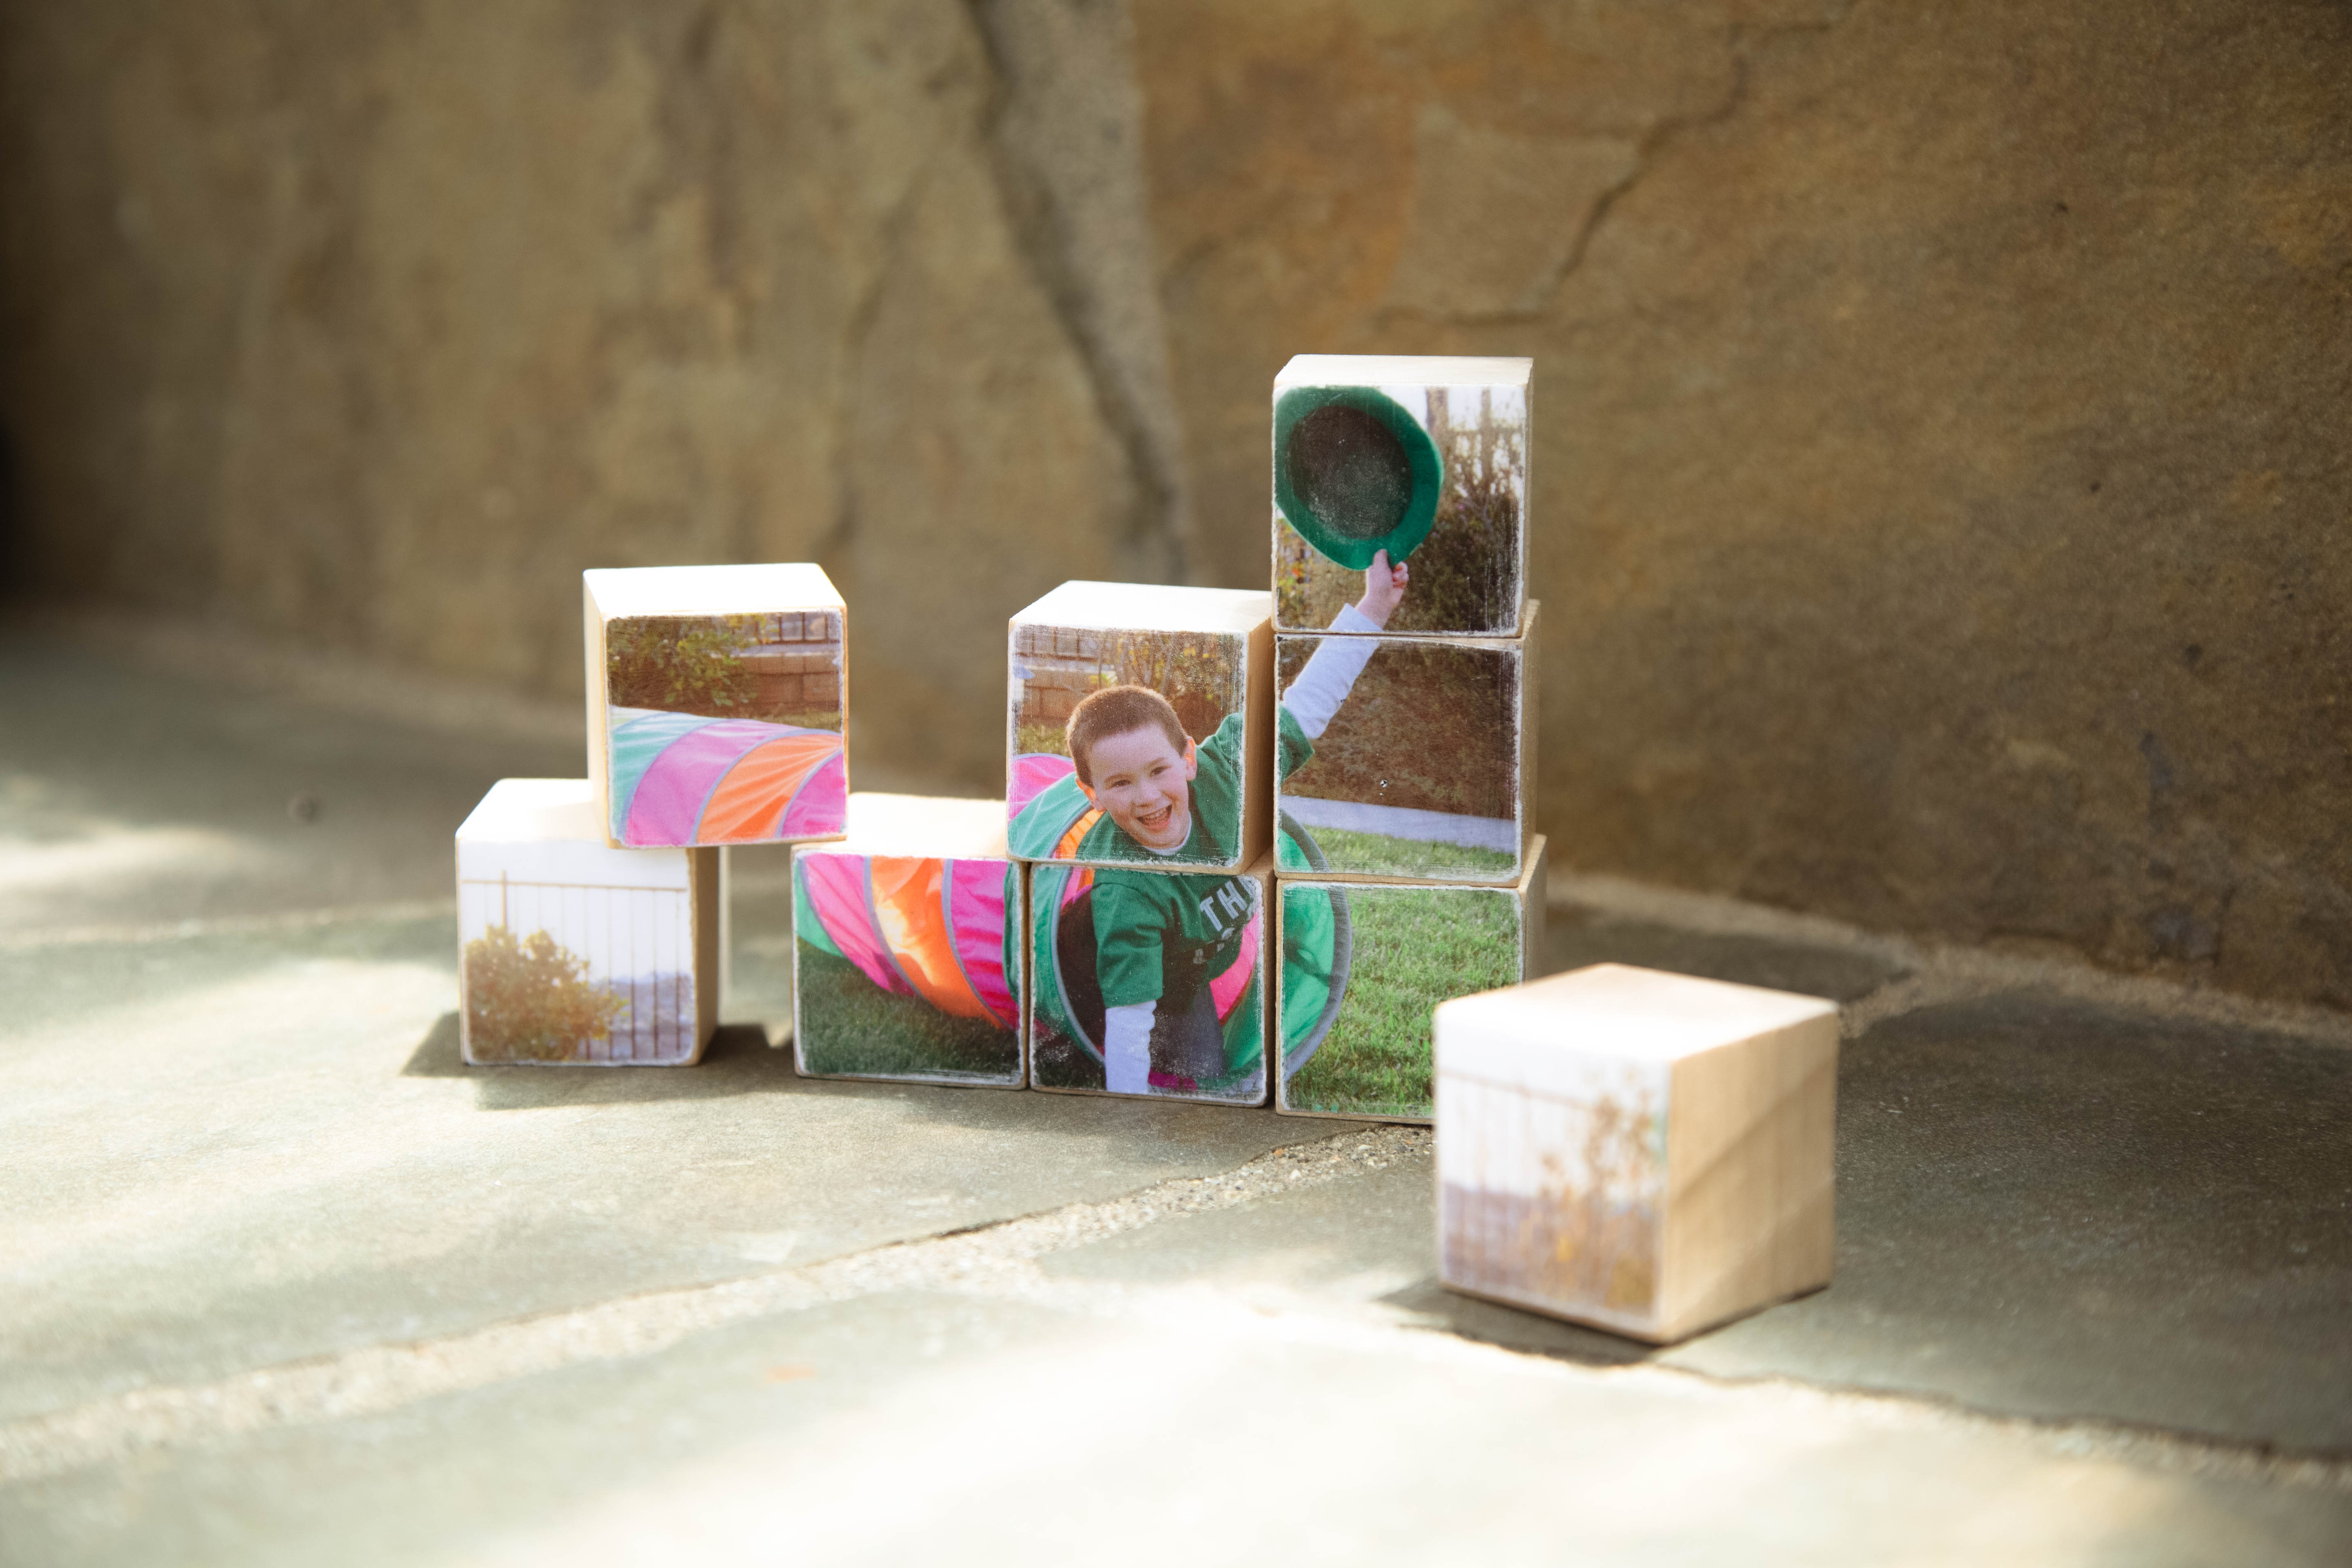
- 9 wooden blocks
- Mod Podge
- Scissors
- Exacto knife or utility blade
- Sand paper
- Paint brush
How to make it
- If you printed it actual size on an 8.5 x 11 letter paper with the directions above, just cut the picture out at the image edges making the finished size 4.5″ x 4.5″. We like to use a paper trimmer for this for nice clean lines.
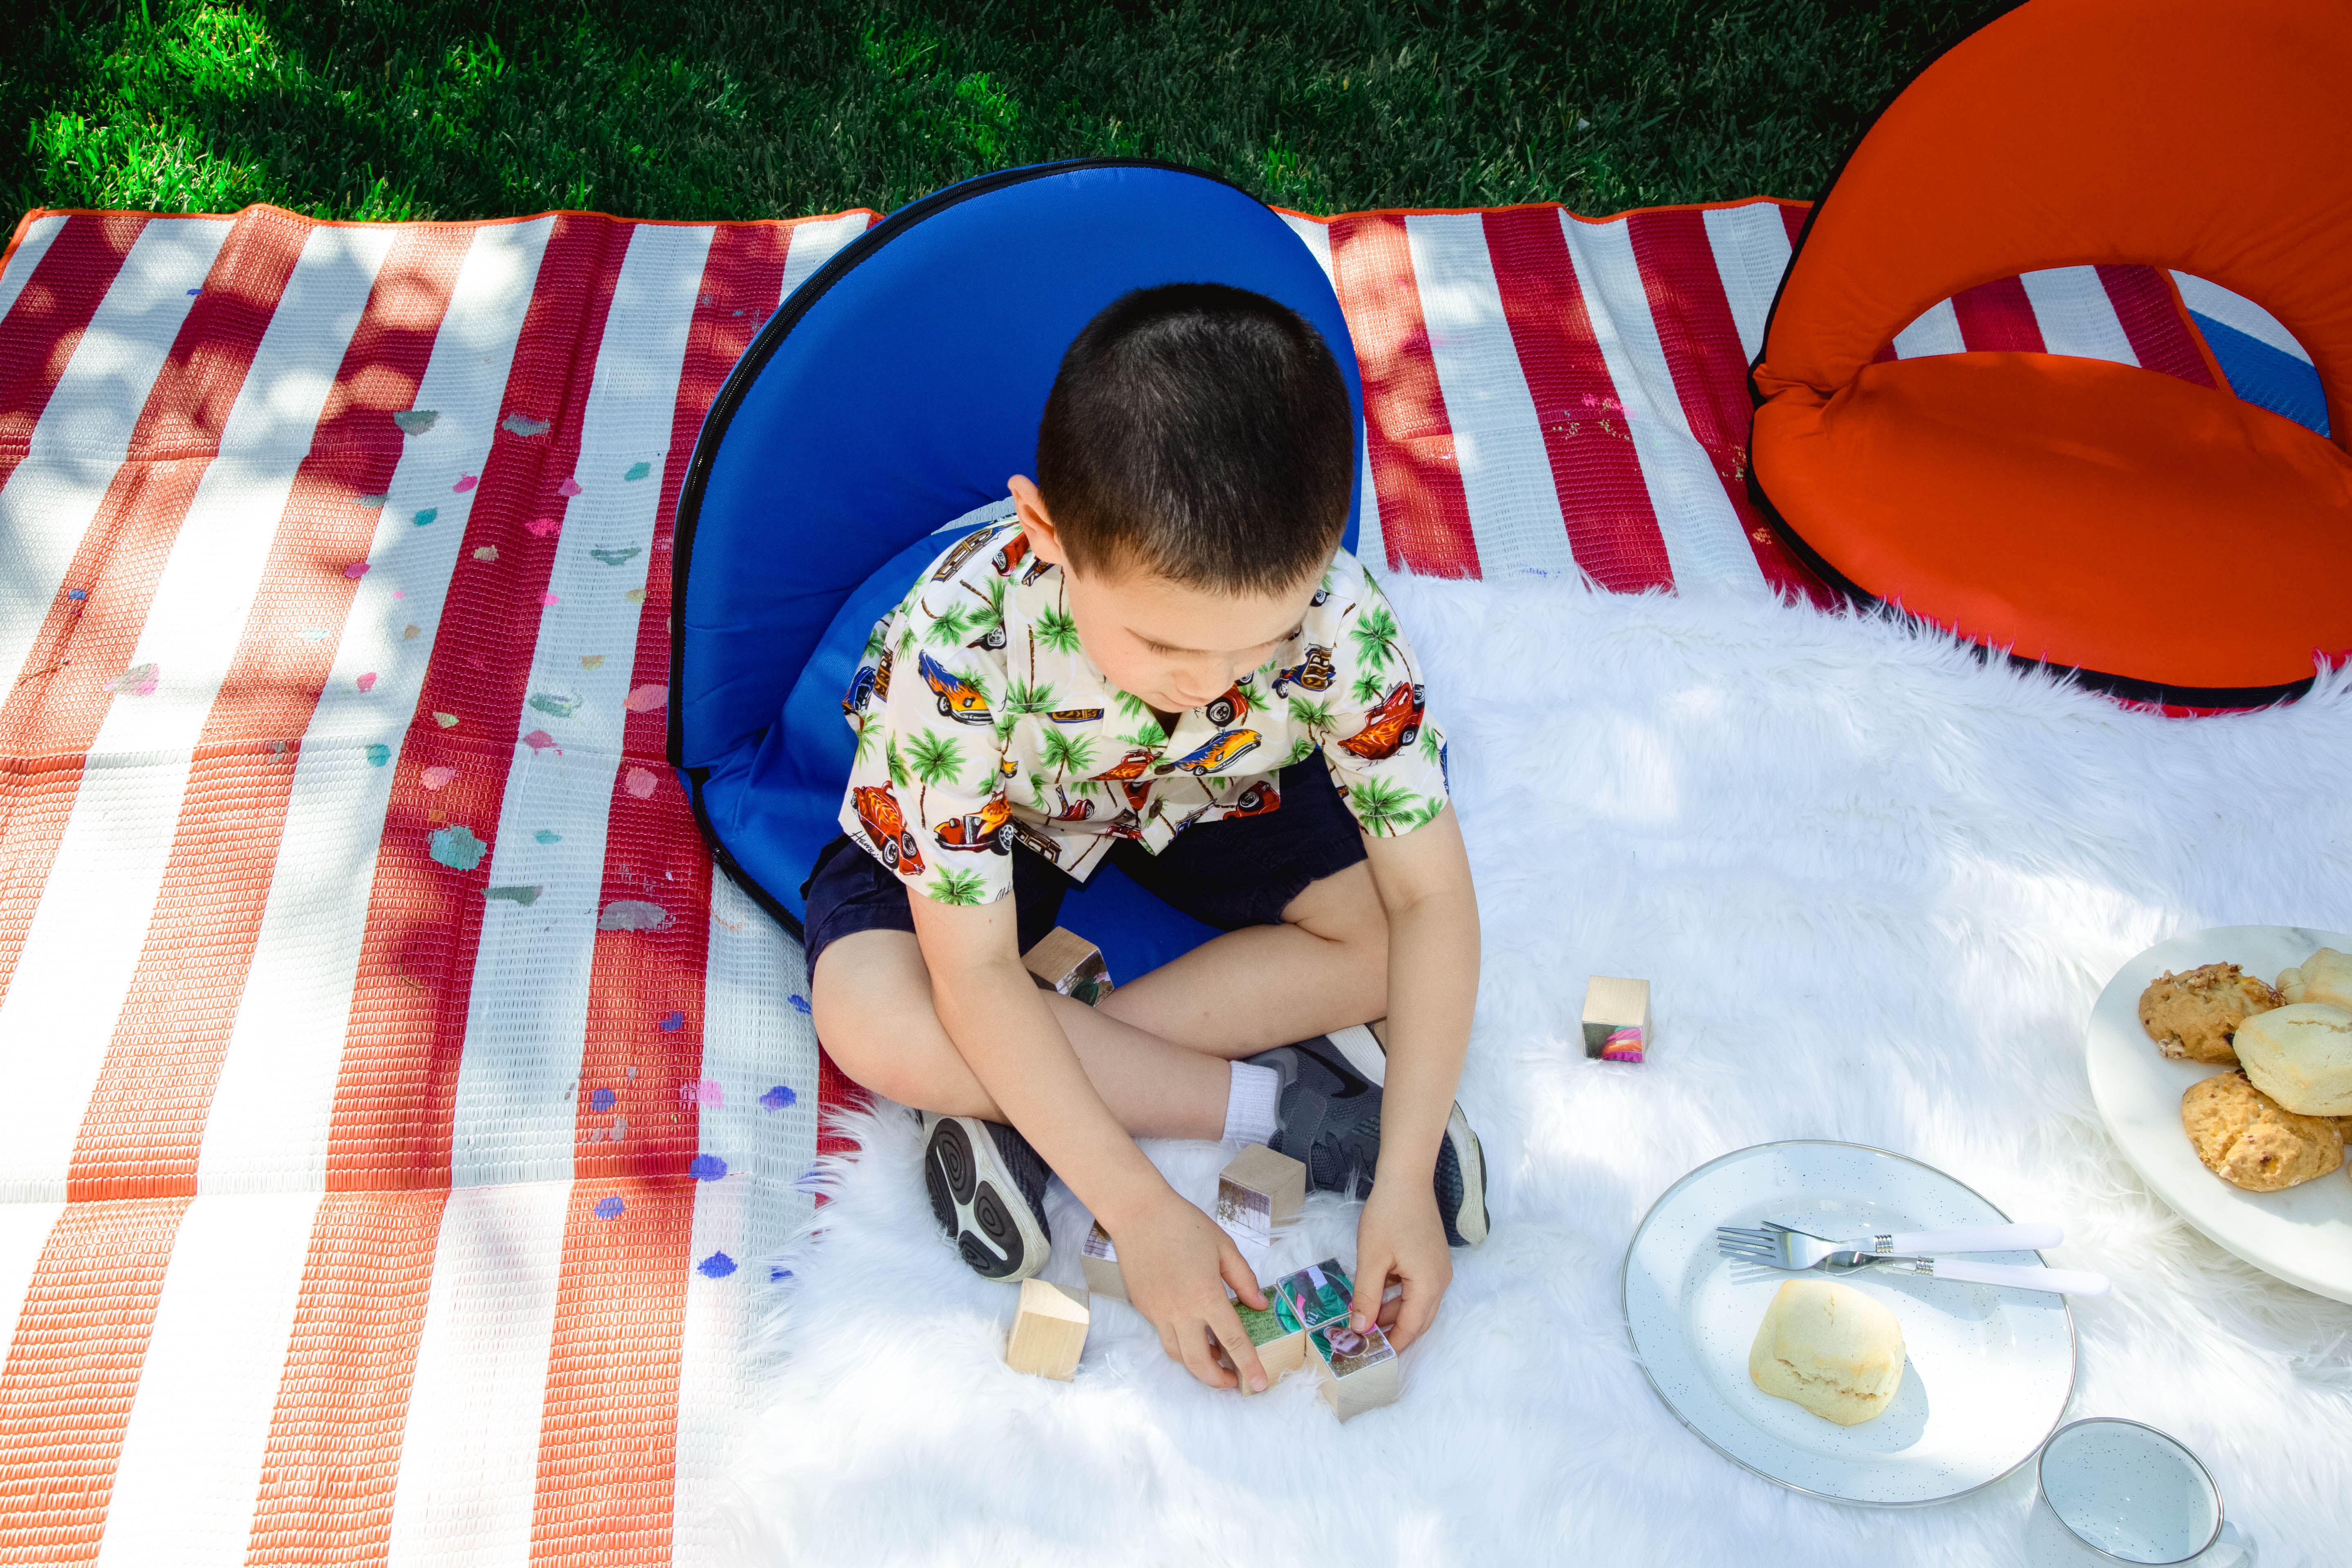
- Put the 9 wooden blocks together in 3 rows of 3 making a perfect square
- Be mindful to leave no gaps behind and that they are all touching!
- Brush Mod Podge on the tops of the wooden blocks and gently place the image on top
- Secure the photo to the blocks by applying firm pressure with your hands
- After giving it a little bit of time to dry (about a half an hour), gently score around each block. Once you have your score lines, (We use the dull side of our utility knife to make our score lines) you will be able to see where you should cut your lines using an exacto knife or utility blade.
- Parents only, of course!
- Once all the blocks are out, sand the edges of the photo on each block with the sandpaper
- This will make the photo squares look more organic and like they are part of the block
- Optional: At the bottom corner block, have your little one write “Father’s Day 2018” with Sharpie to commemorate the year
- Apply a final coat of Mod Podge to the top of the photo blocks as a sealer with the paint brush. TIP: The glue will go on opaque and will dry clear so don’t be concerned when you first are covering up your image with the glue!
- You can also check out Michele Baratta’s tutorial video! She shows you a step by step video on how to make it!
Congrats – you are finished and finally have your Father’s Day gift! Now, you have a beautiful image on a bunch of blocks that looks complicated to Dad but is super easy (he never has to know!), and most importantly, it is something that Dad will love and have forever!
Father’s Day Ideas
So now that you’ve got your gift for Dad, what do you plan on doing for Father’s Day? If you are stuck, fresh out of ideas and looking for something you can pull off last-minute, lucky for you we’ve got your back with a few of our favorite things to do with Dad:
- BBQ time! Give dad a break from the grill and treat him to some delicious backyard fun with the little ones. Heat up the pool if you’ve got one, and spend the day outside with your Teacher Chairs!
- Take him to a sports game! Check out ticket sites like Ticketmaster or StubHub to see if there’s a game to take him and the kids to – and the best part is, they usually do giveaway prizes on holidays like Father’s Day. Make sure to bring your Teacher Chairs, because sports venue seats can often be hard and uncomfortable!
- Surprise him with brunch! Spend some time with the kids in the morning getting a nice brunch ready for Dad with all of his favorite foods, and bonus points if you head to your local store to pick up a few Father’s Day balloons or decorations to make it extra special.
Teacher Chairs
Whether Dad (or mom!) is going to a sporting event or just going to sit outside in the backyard to watch the little ones run amuck, these “Teacher Chairs“ are lightweight, easy to carry, and most importantly, super comfortable! The great thing is that these chairs are made for YOU and your little ones!
Measuring at 21.5” W X 20.5” D X 17” high when opened, they can also be easily wiped off and used inside. It is important for little ones to get carpet time and these chairs are perfect for that to make it more comfortable on adult’s backs. At 21.5” W X 29” D X 2.5” high when folded, it also comes with a strap, making it super easy to carry over your shoulder when your walking. With a sturdy steel frame and super durable fabric, the reclining backrest adjusts to 6 different positions to keep you comfortable and feeling like you’re in your favorite armchair when you’ve got to sit on-the-go.
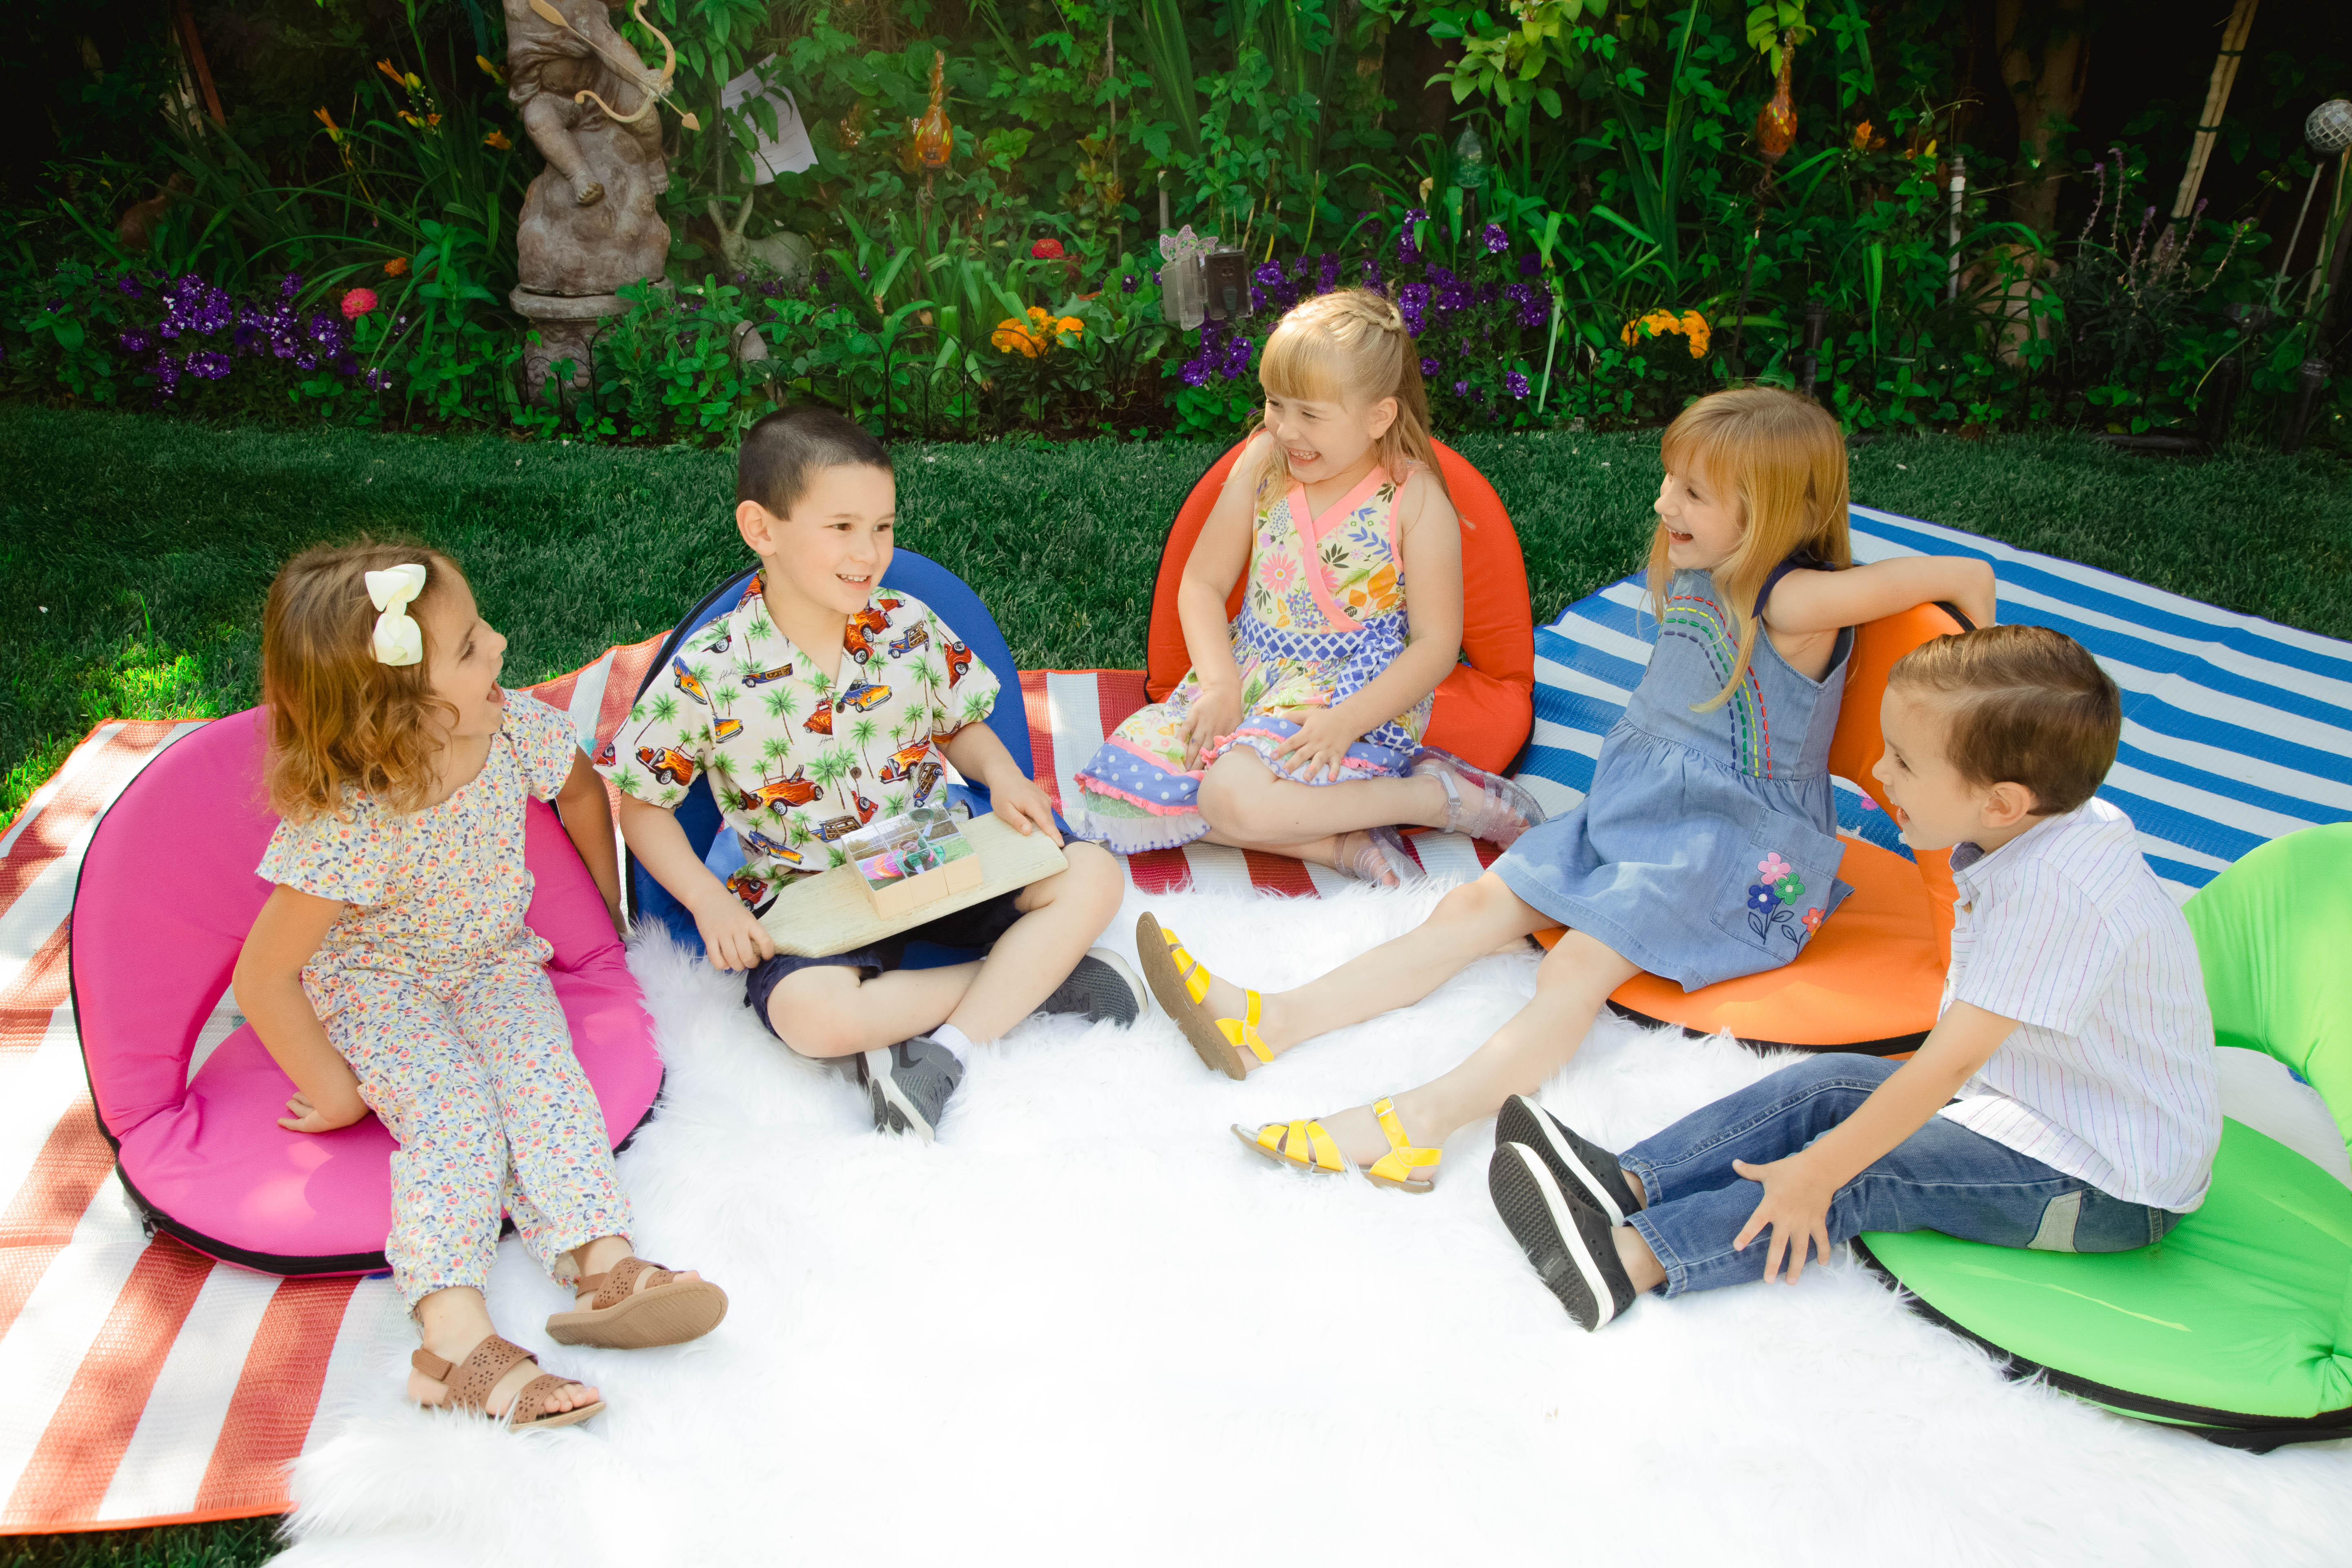
Also great for summer hangouts with your little ones and their friends!
And the perfect companion to our Tatami Mats for your outdoor DIY craft stations!

Let us know!
What are you doing for Father’s Day this year? Did you make the Father’s Day DIY Photo Puzzle, or have another great Father’s Day DIY gift idea in mind? Let us know in the comments!